Public SaaS
RoostGPT UI :
Access Public SaaS at https://app.roost.ai/login
Roost GPT allows the user to automate their test against their code repository.
Below is the UI structure of RoostGPT which has two header tabs Test and Events.
-
The "Events Tab" shows the individual test generation trigger details and is explained in detail later.
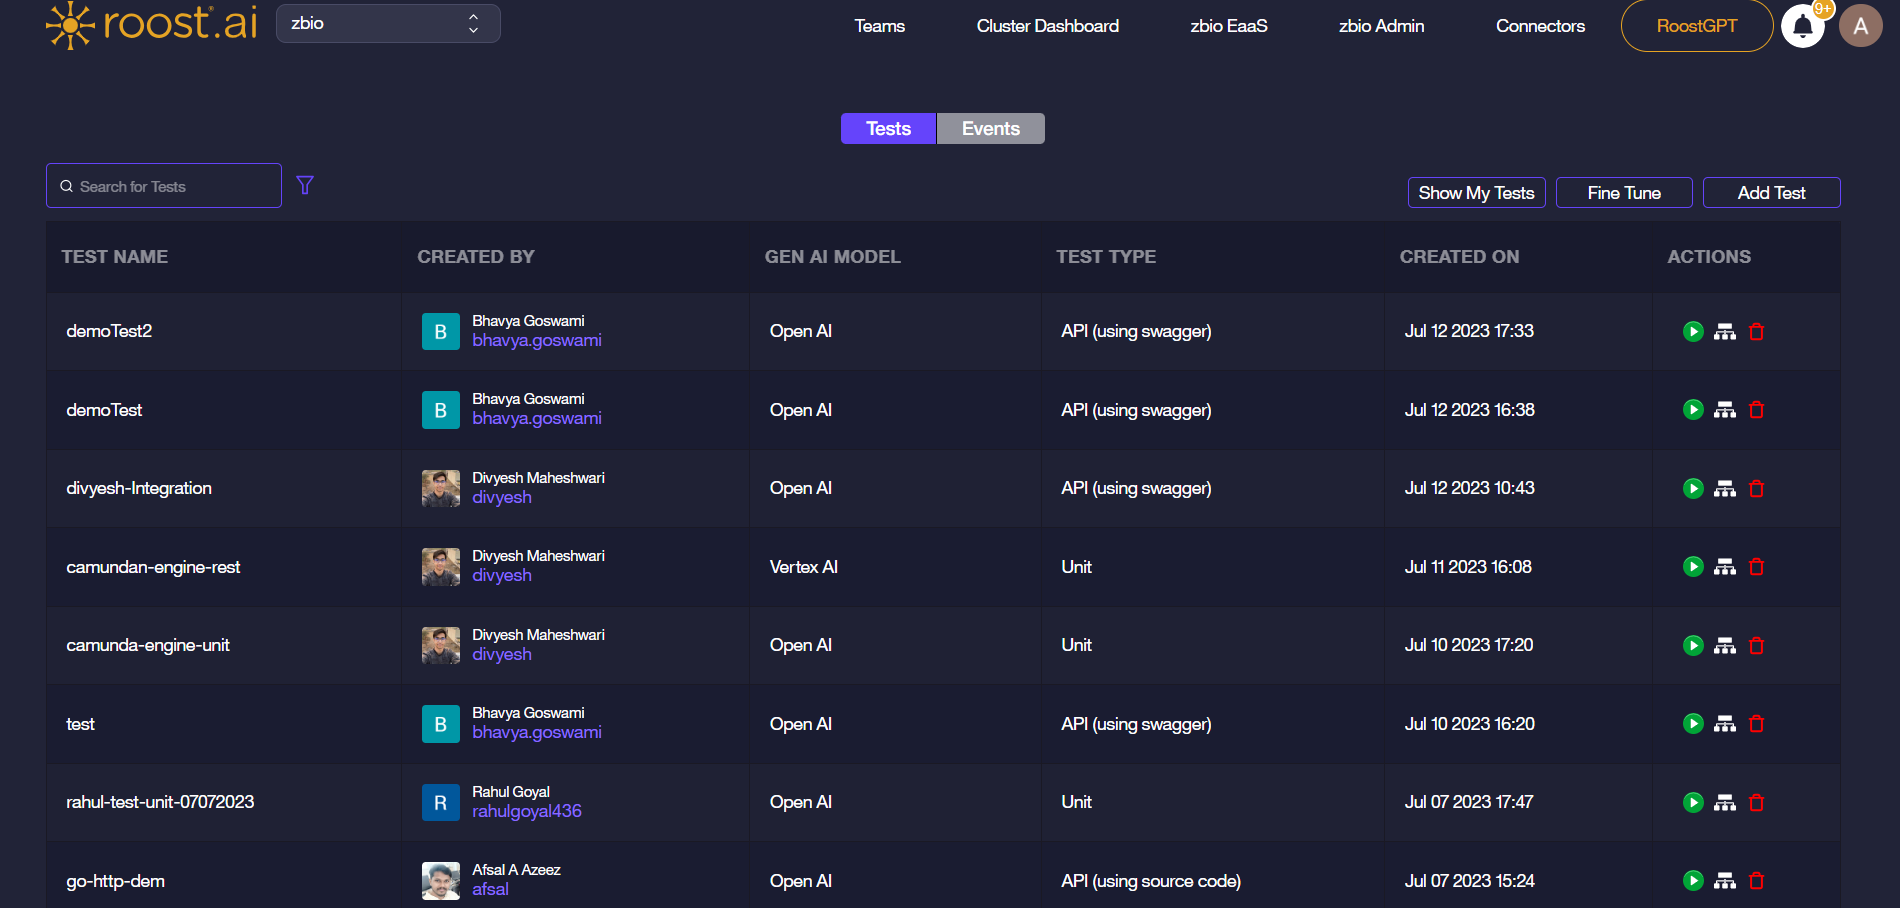
- The table under "Test Tab" shows details such as
- Test Name,
- Created By,
- GenAI Model used for test generation ,
- Test Type weather it is Unit Test, Functional Test, API(using swagger) and API(using source code)
- Test create date.
- Actions are available in "Test Tab"
- to trigger the test generation,
- to view the test configuration or workflow and
- to delete the test
- Search box on the page allows to search tests by name
- Project Admins can view and edit anyone's tests workflows
- Regular project members can view only their test workflows
View of the Test Tab
Add Test
In case of Add Test it opens up the below page, which has 5 sections ->
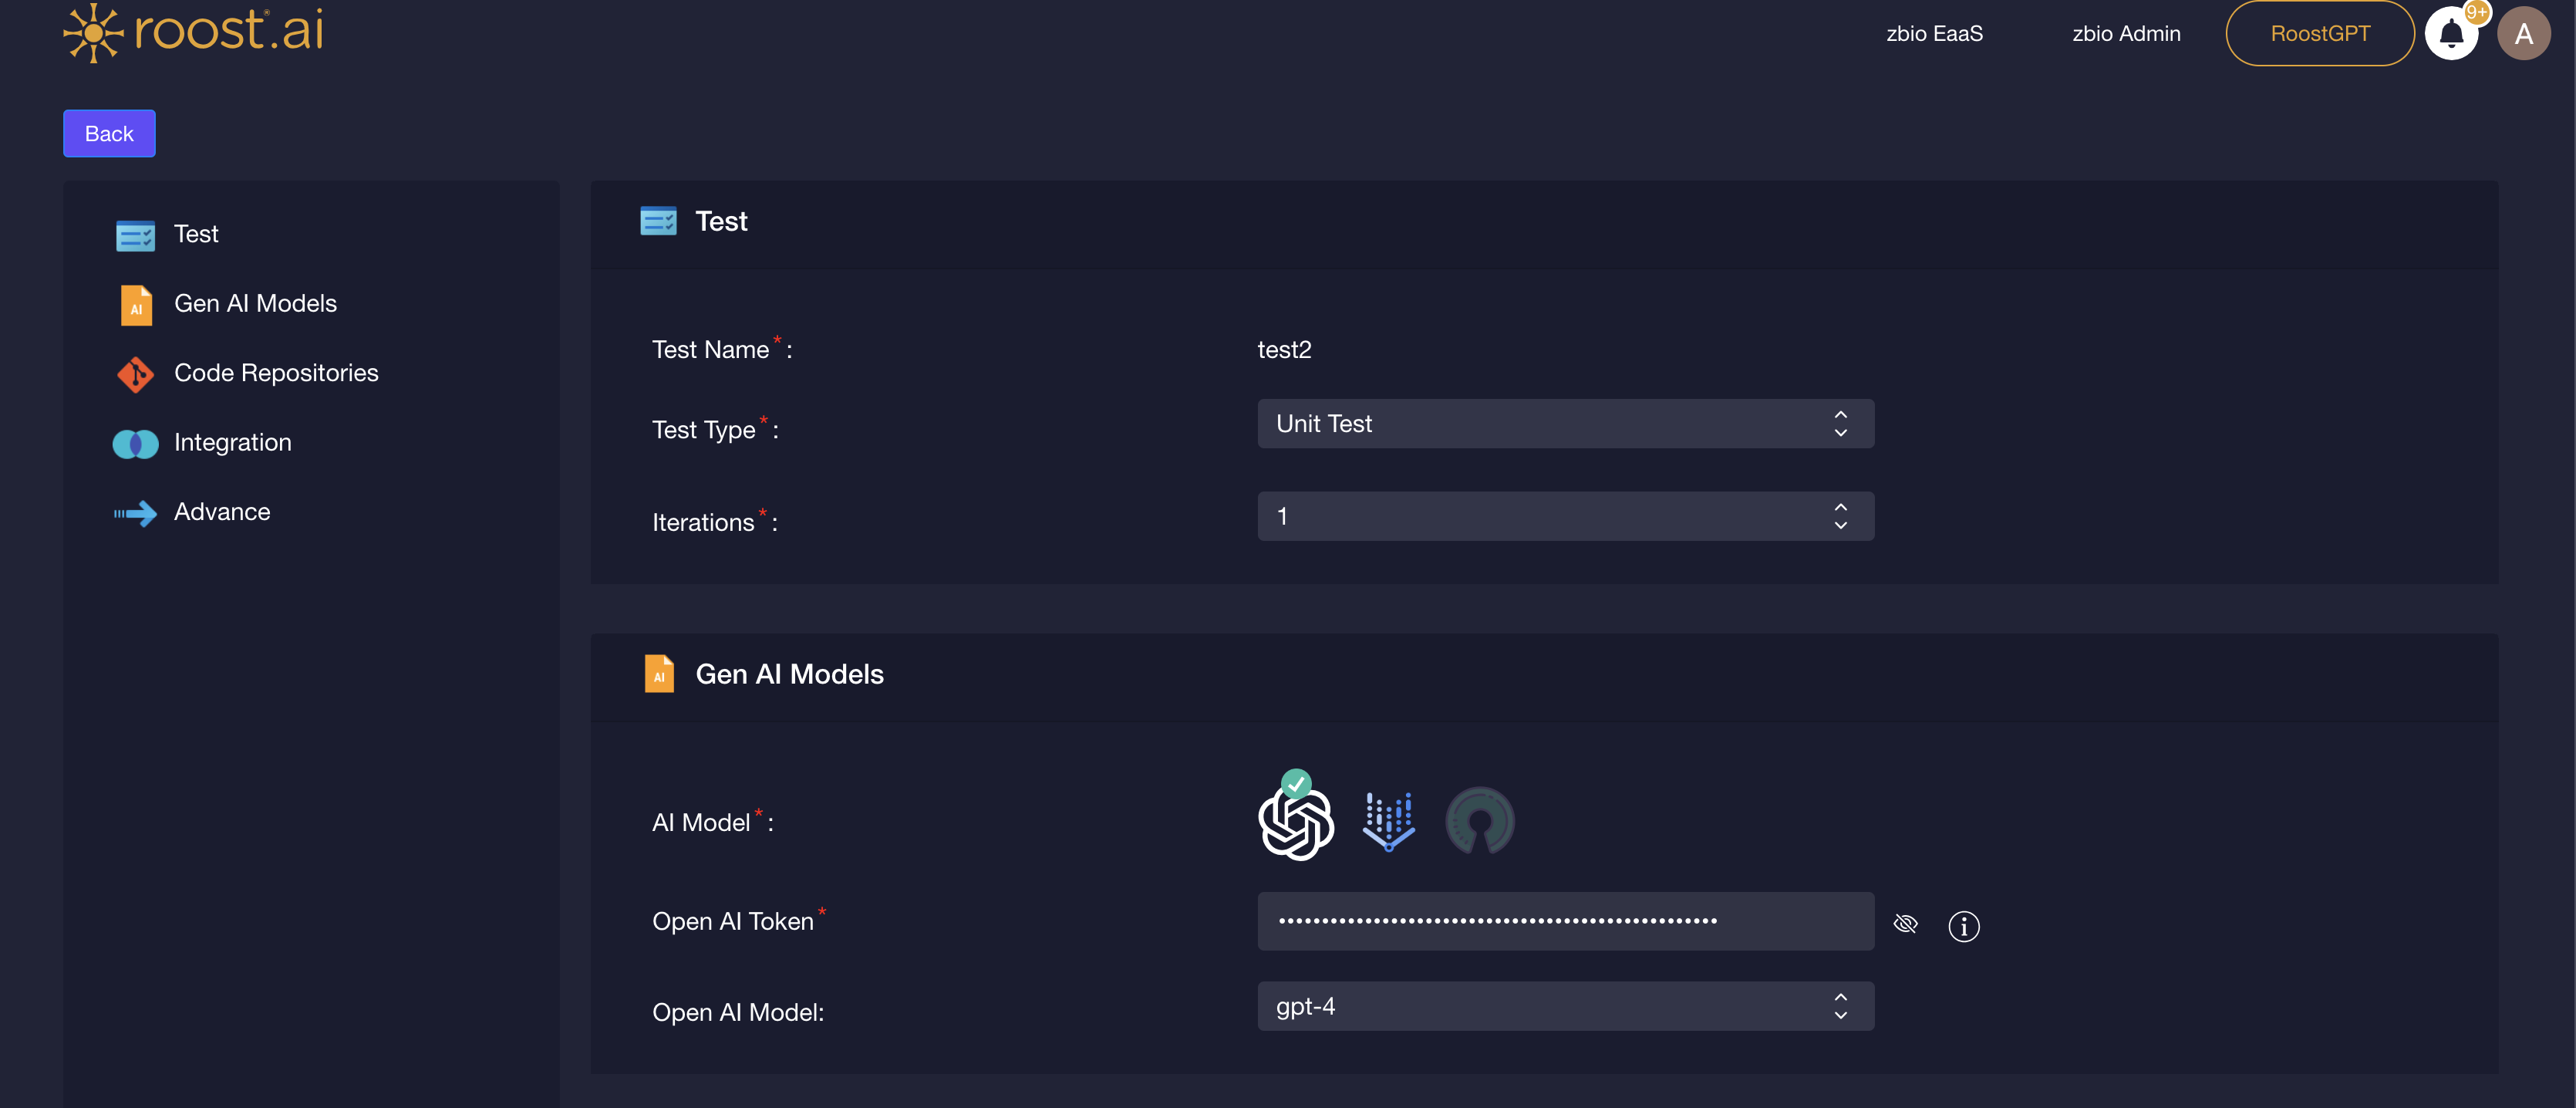
- Provide a Test Name
- Select the Test Type (Unit Tests , Functional and Non Functional Tests, (API using swagger), API(using source code) and integration tests.
- Choose GenAI Models which has OpenAI Model and VertexAI Model and field to input their respective tokens. After the token verification, model specific details will be available for selection, such as
- For openAI, you can choose GPT-3.5 or GPT-4,
- For Vertex AI, you need to specify vertex project id, region and vertex model.

- Select SCCS (Source Code Repositories) from available
- Github (Cloud and self hosted) ,
- Gitlab,(cloud and self managed),
- Azure Devops and
- Bitbucket(cloud and self hosted).

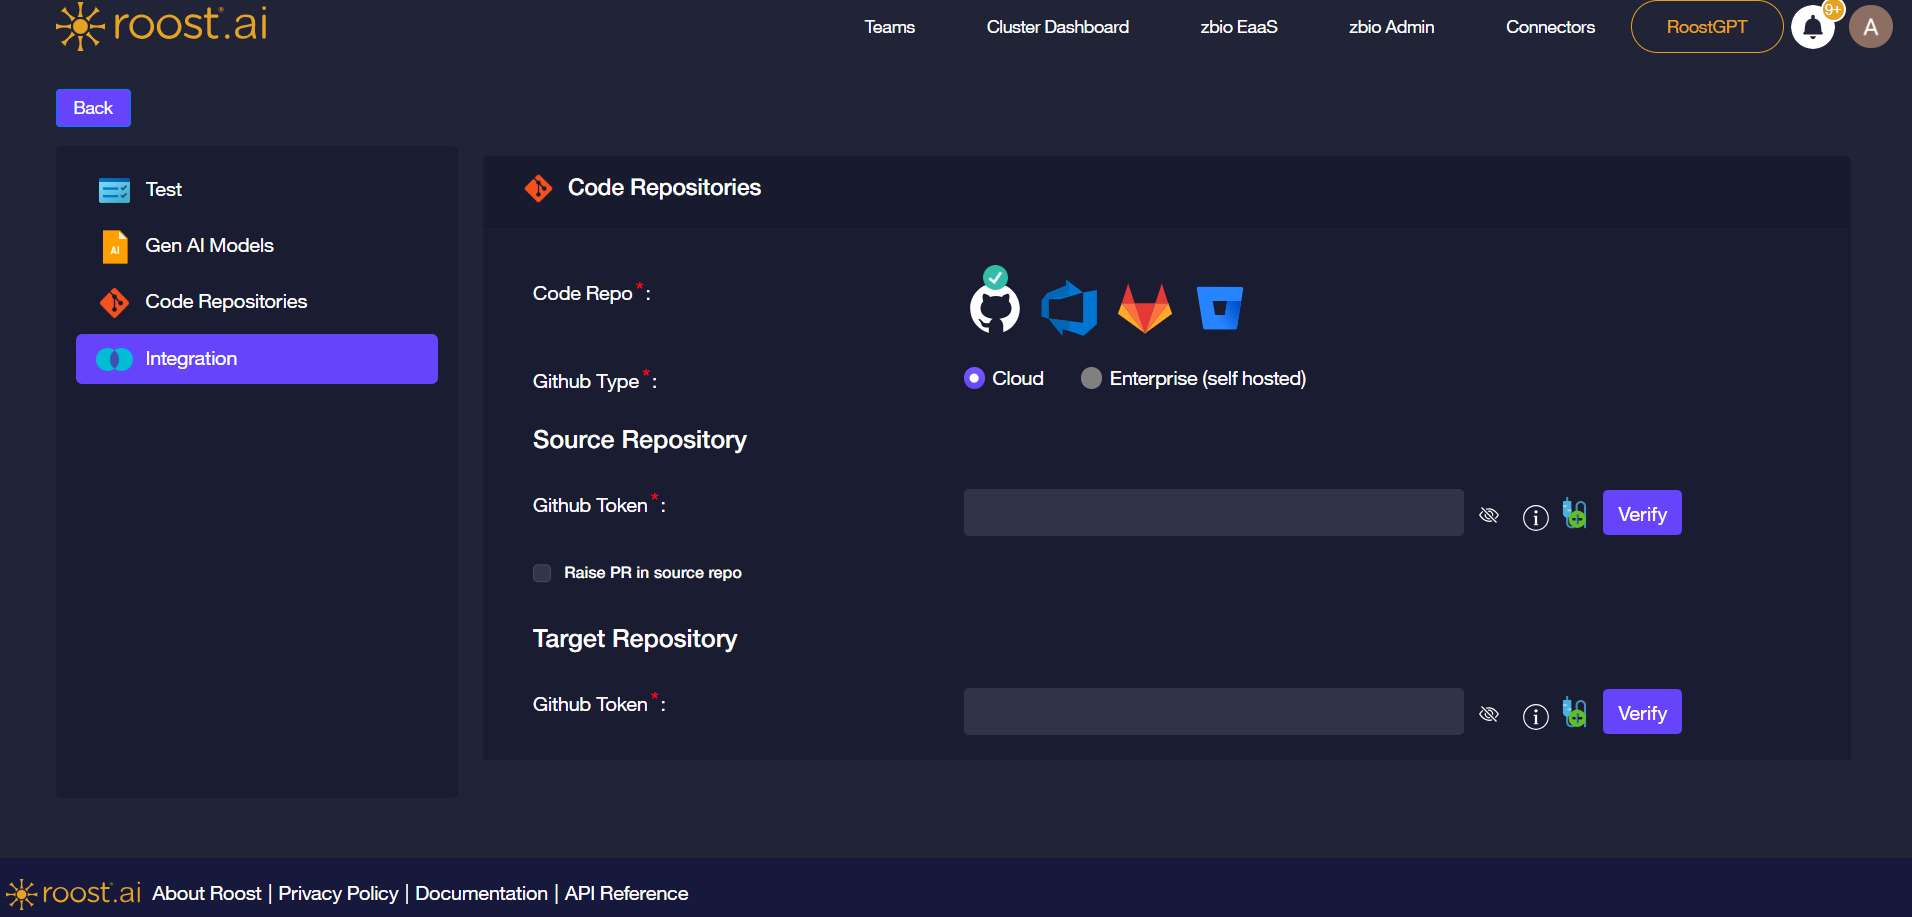
- After the SCCS token verification, you can provide the code repo, branch, language and their versions.
- Languages supported are Java, Python, C#, Go
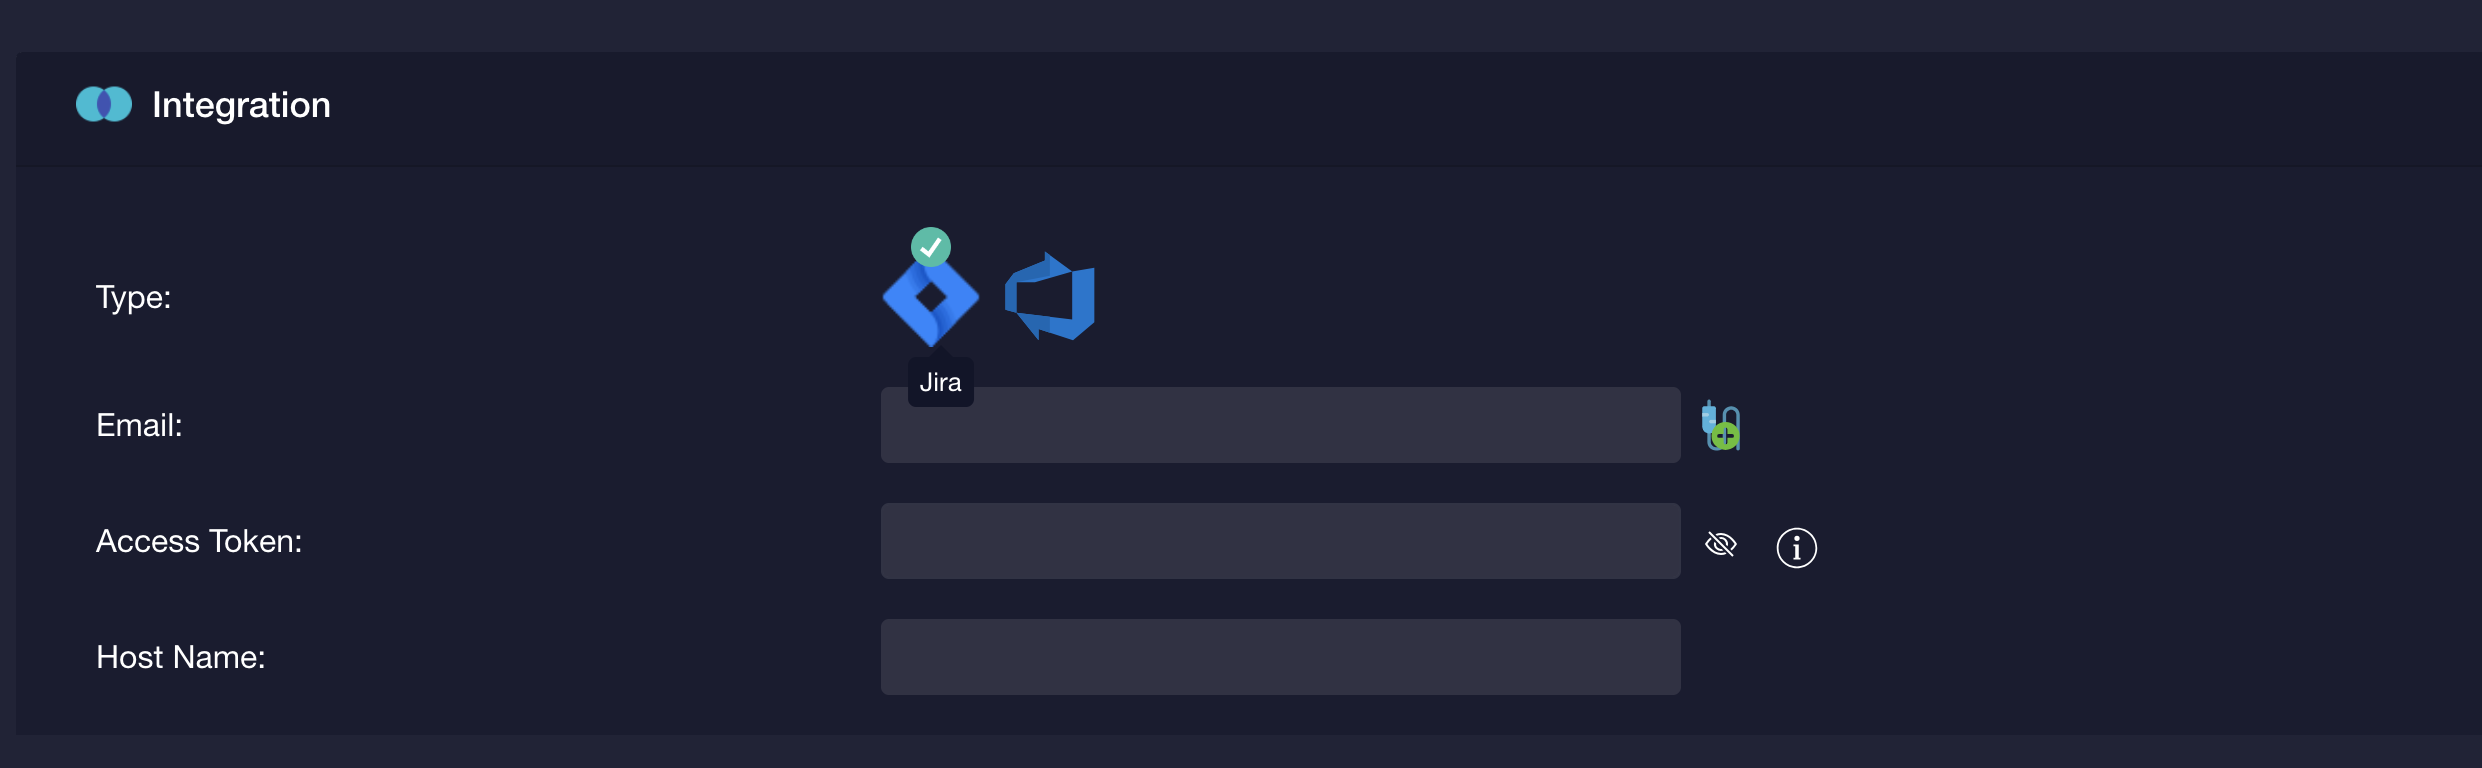
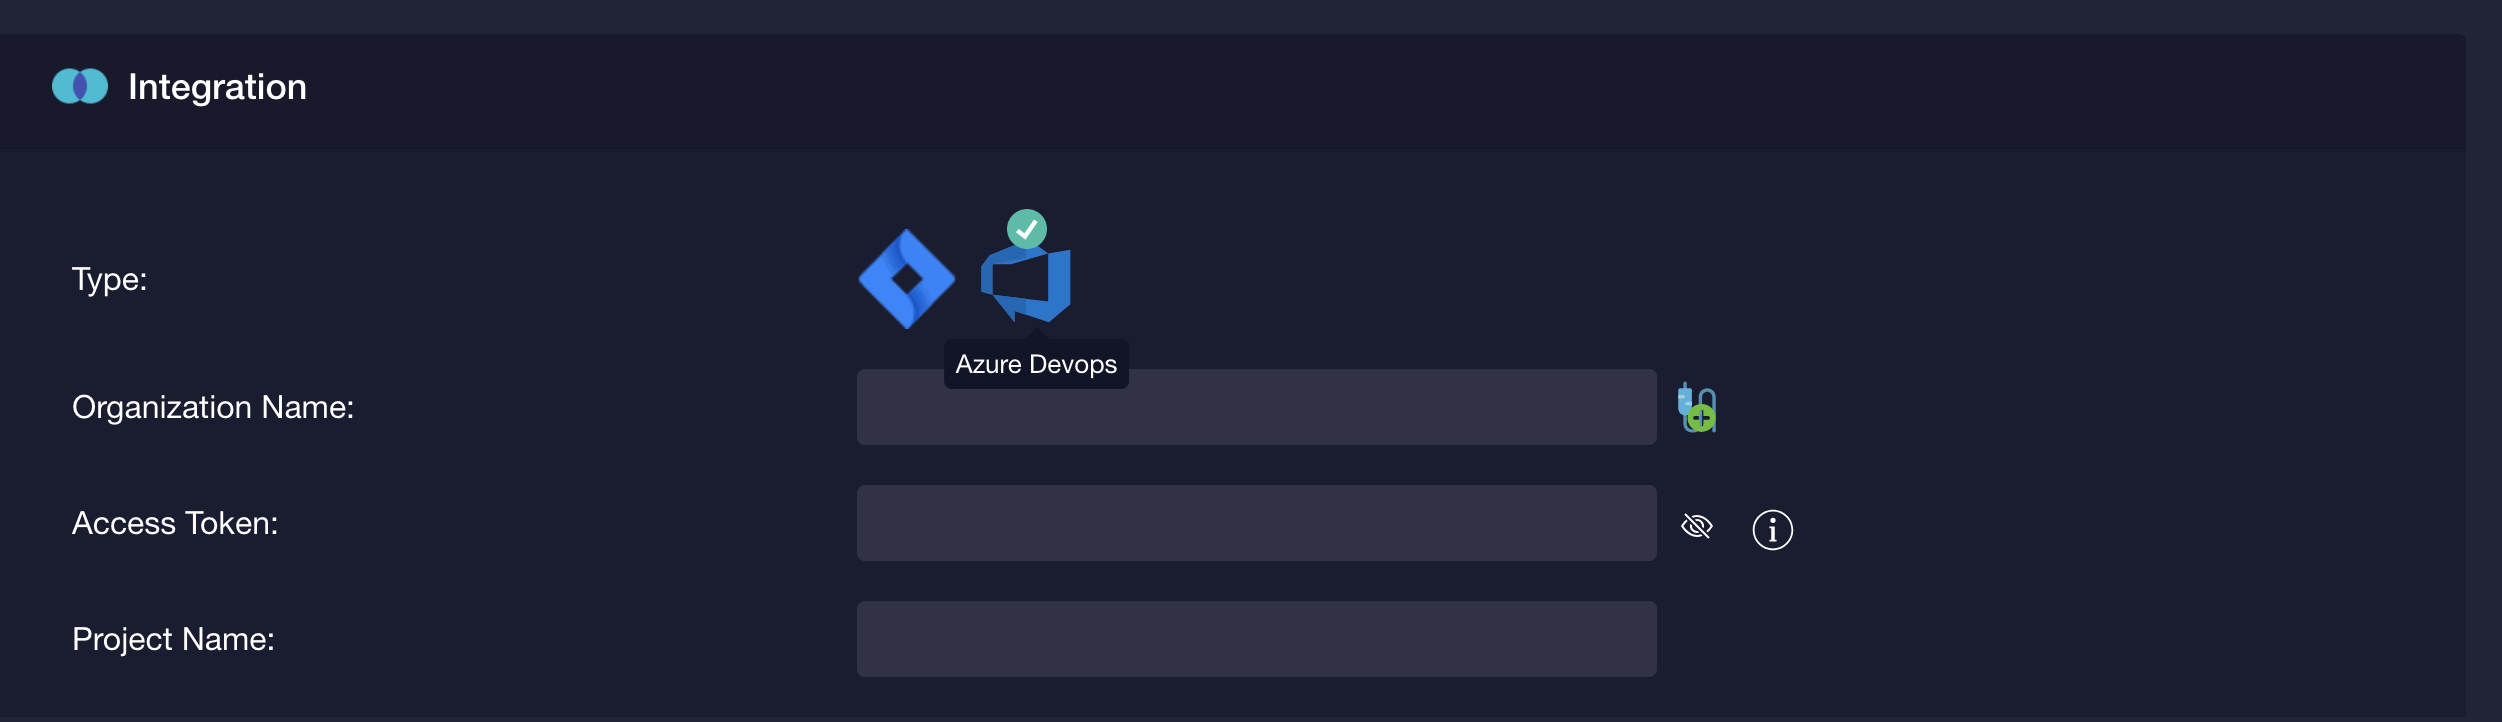
- Optional Integration with ticketing tools like Jira and Azure DevOps is available.
- Jira requires email address associated with jira account, jira hostname and the access token for your jira account.
- Azure Devops requires the Organization Name associated with Azure Devops account, access token for authenticating with Azure Devops and the Project Name for Azure Devops.
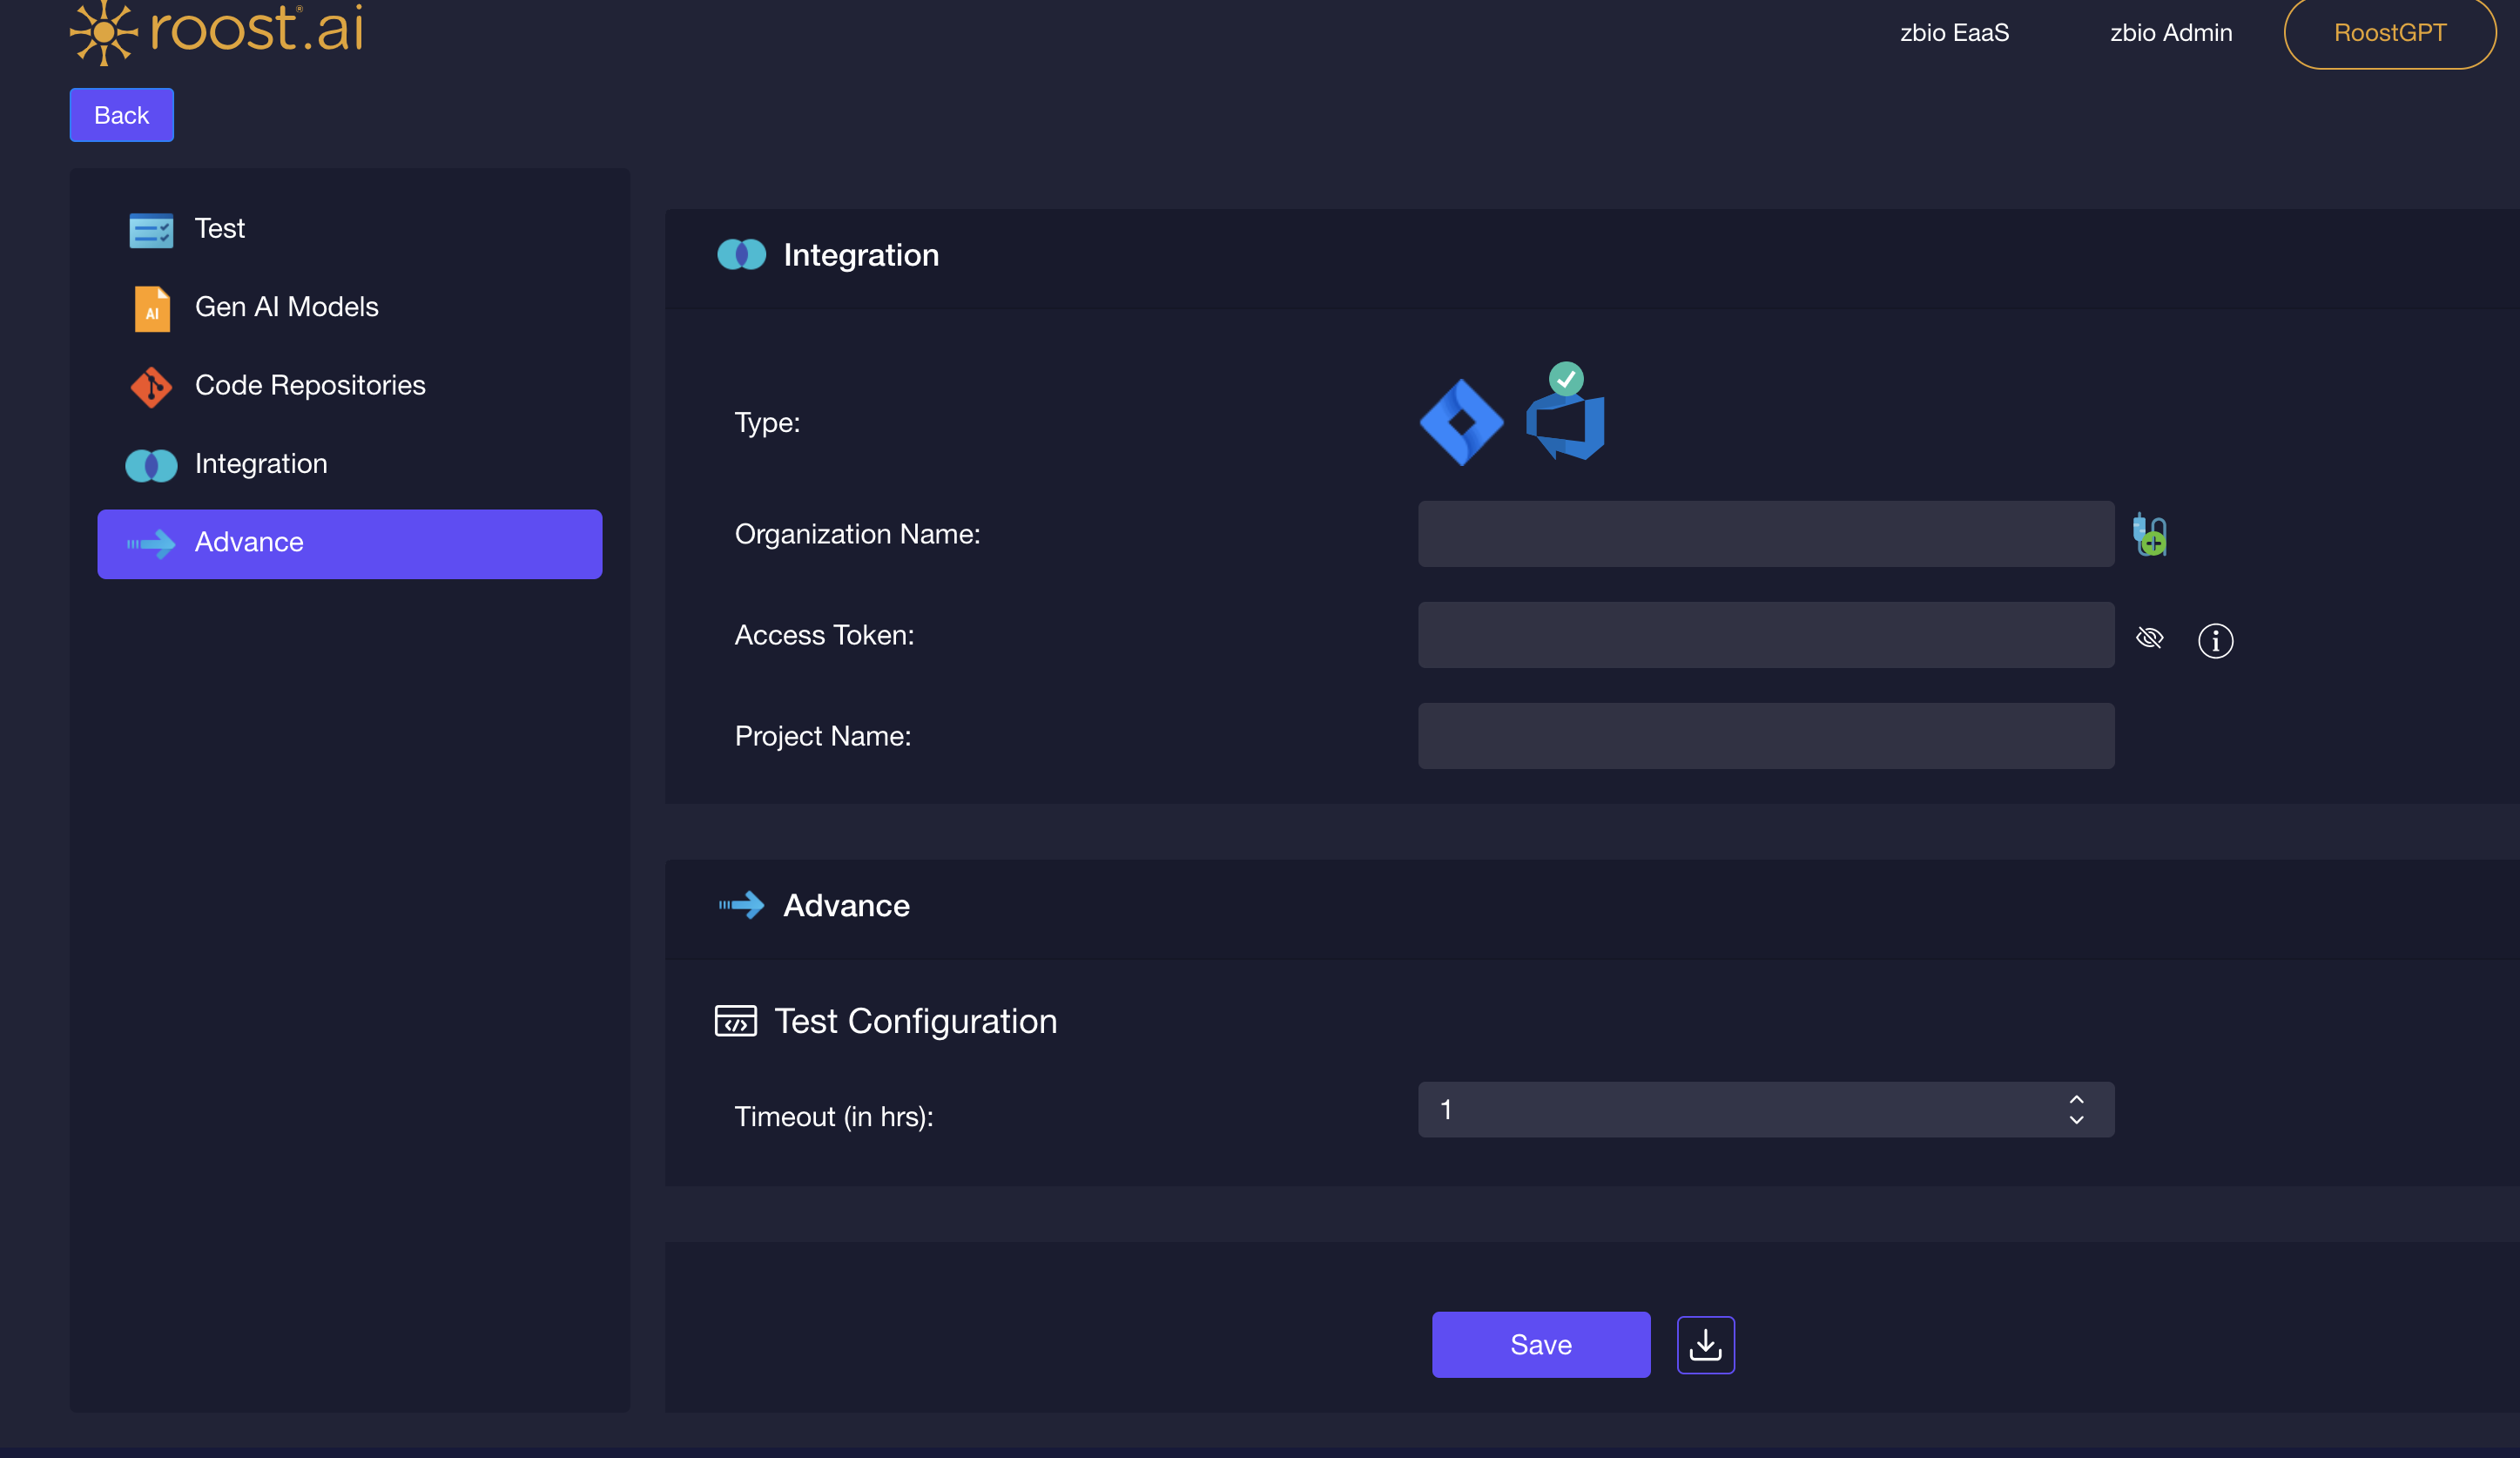
5. In Advance Timeout (in hrs) can be specified, for which the time the test will be on triggered mode
On click of save Button you can save your test and see the test you saved in the test header section. On click of download icon configuration for the test will be downloaded.
Workflow View
This will show you the workflow of your test, details you filled while adding your test.
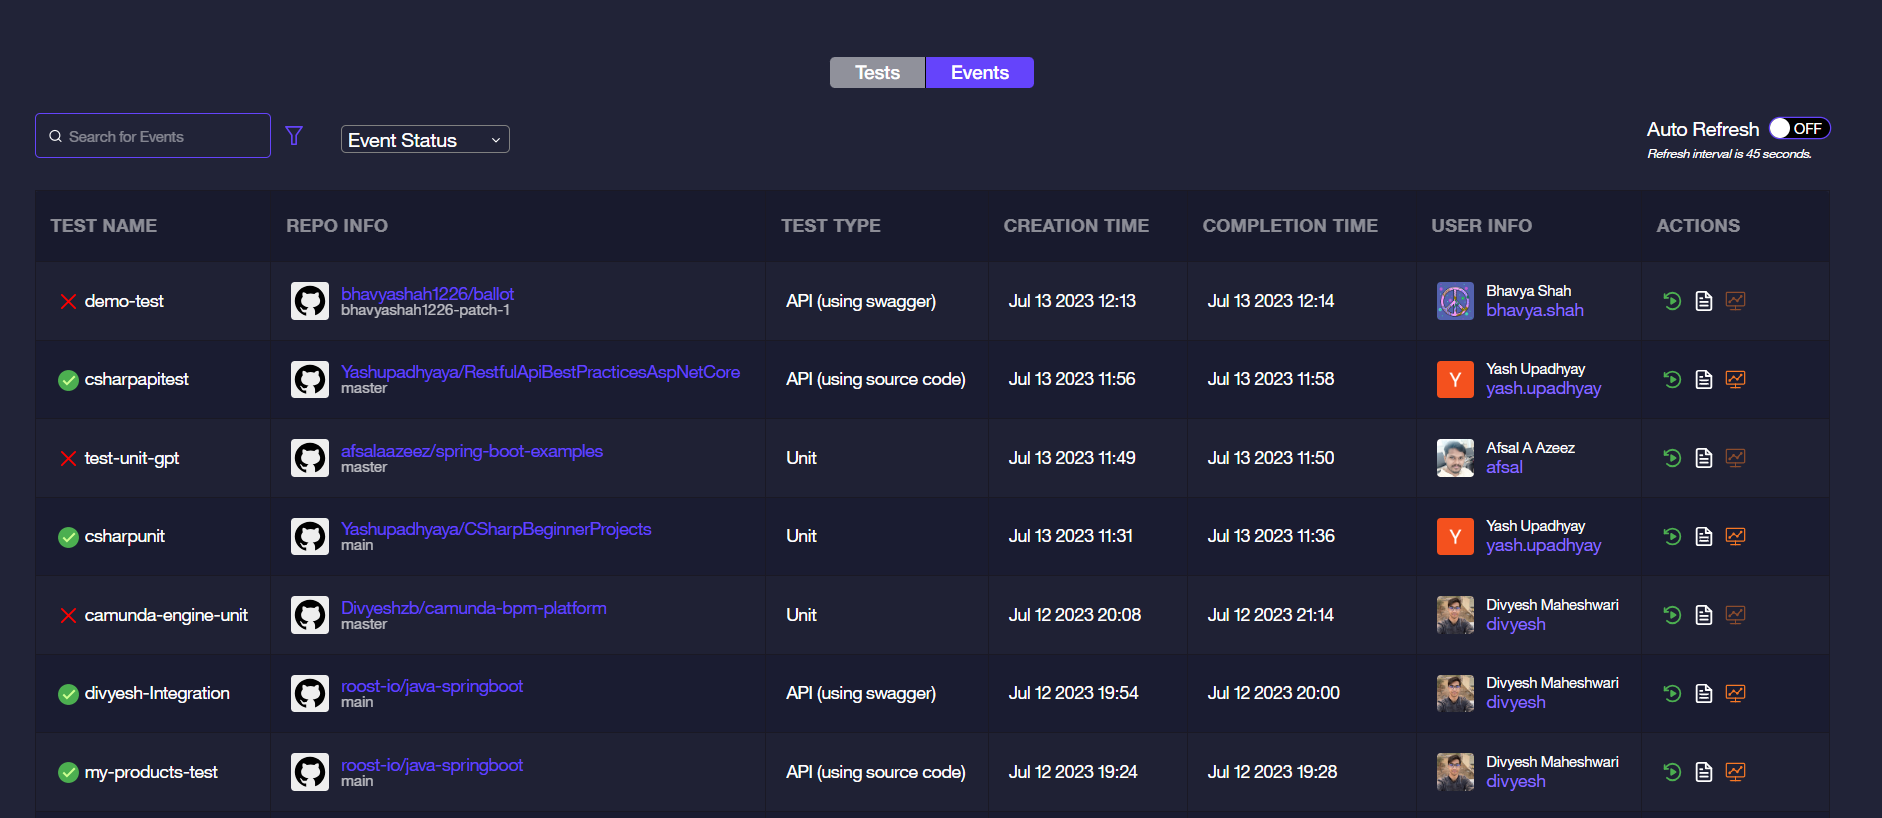
Events View
Events view contains status of all the triggered test. Event Status filter shows the status of these events weather it is in Progress, timed out, aborted, completed or failed and the fields in the table show the test name with the status of the events and the status icons also the information of the repo, type of test, creation and completion time, user Information and action icons for re-triggering the test again, logs view and the insights
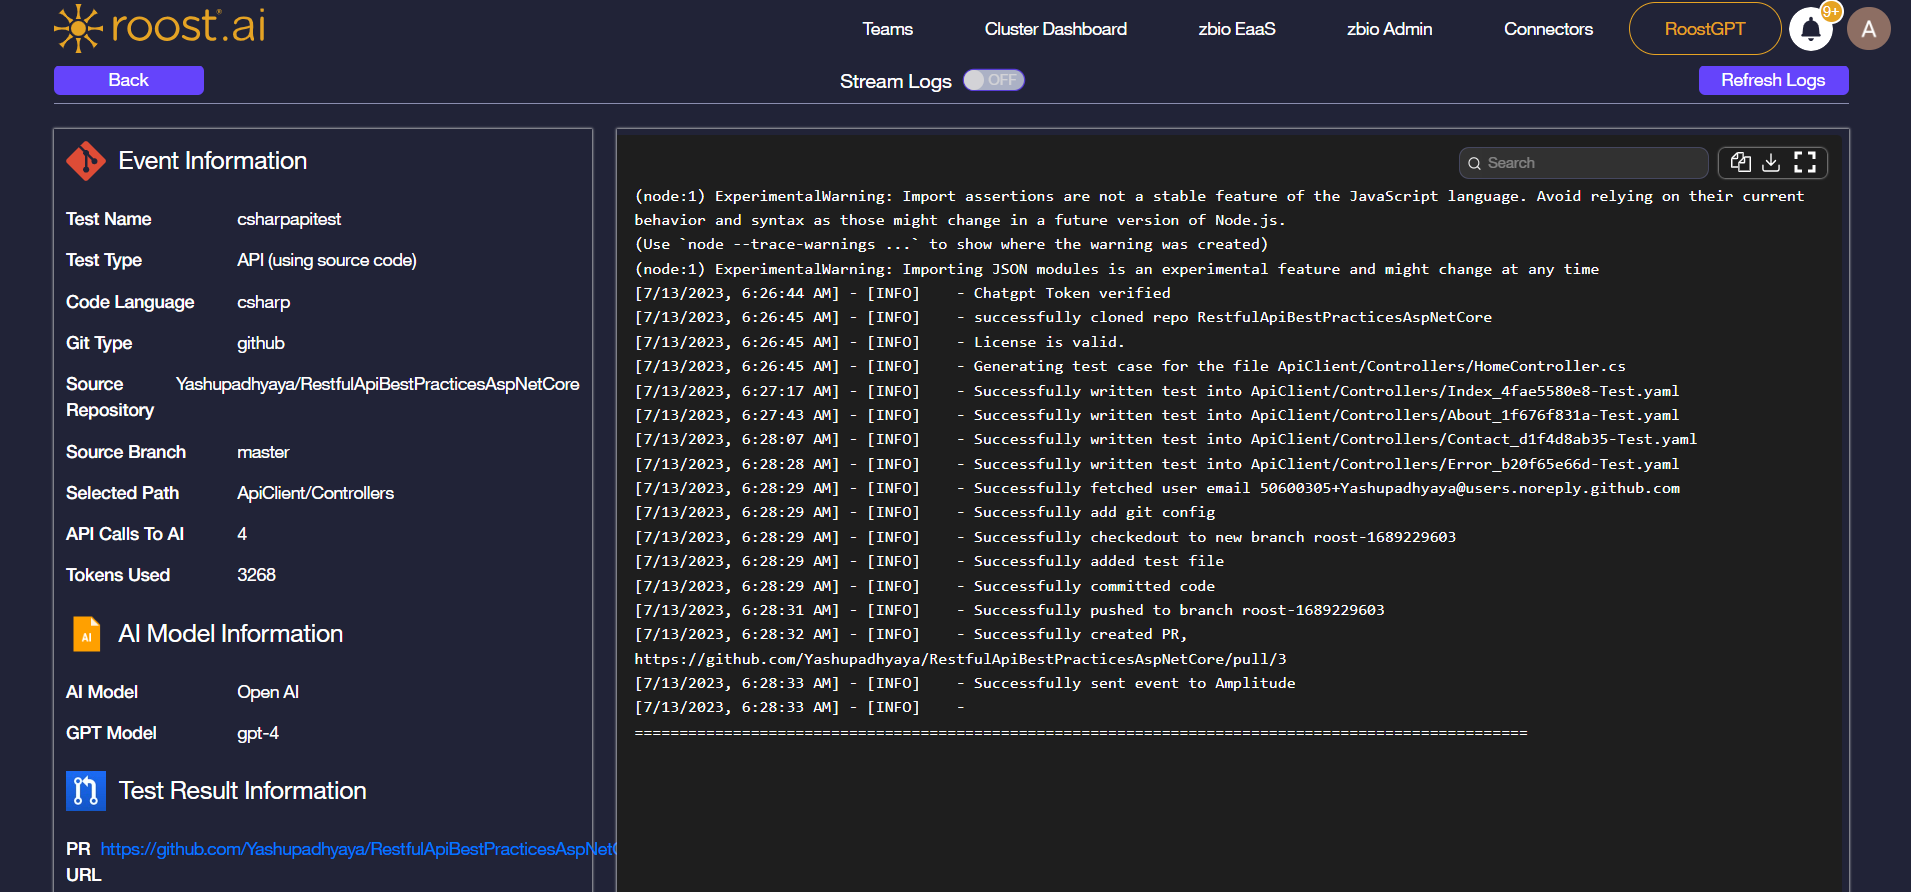
Logs View
Logs View contains the Event Information, AI Model Information and the Test Result Information having PR URL of your generated test on the left side and the Logs View container on the right side which has search Bar for searching in the logs and copy icon and download icons to copy and download logs respectively.
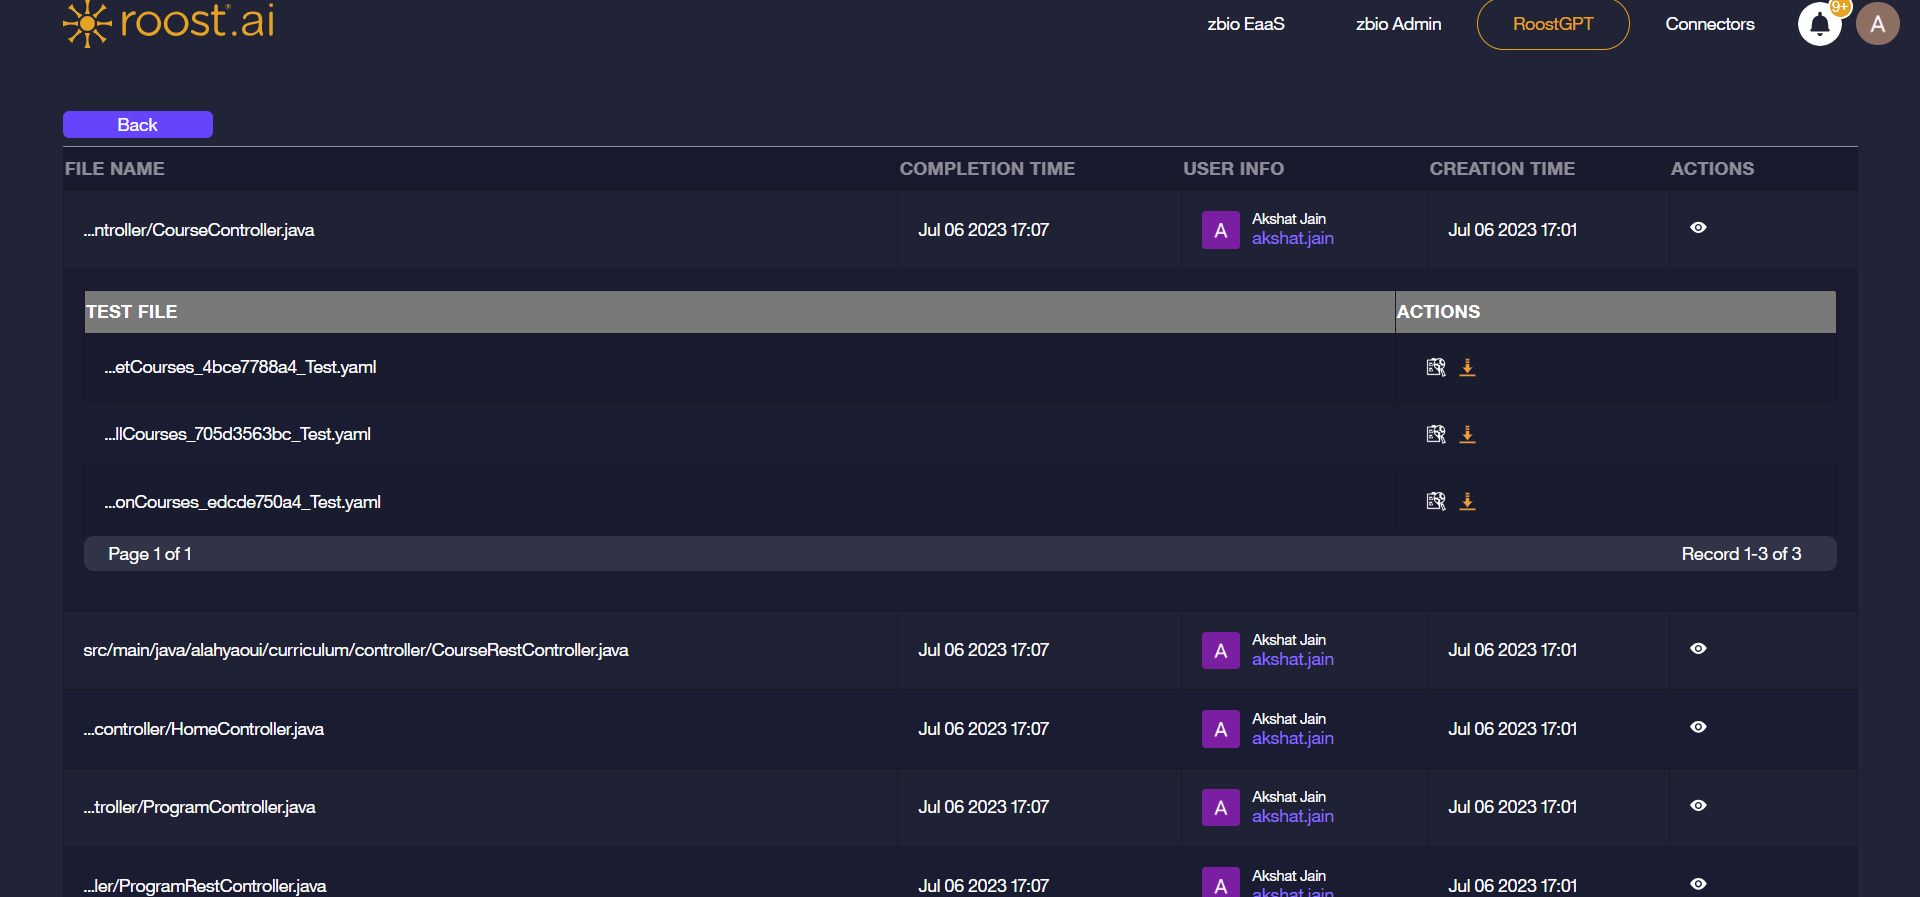
Insights View
Insights view gives you the details about your test, here it will show your test files, their completion and creation time and corresponding action icons for Analyze and improve for further analysis and improvement of your tests and download , for downloading the test file. 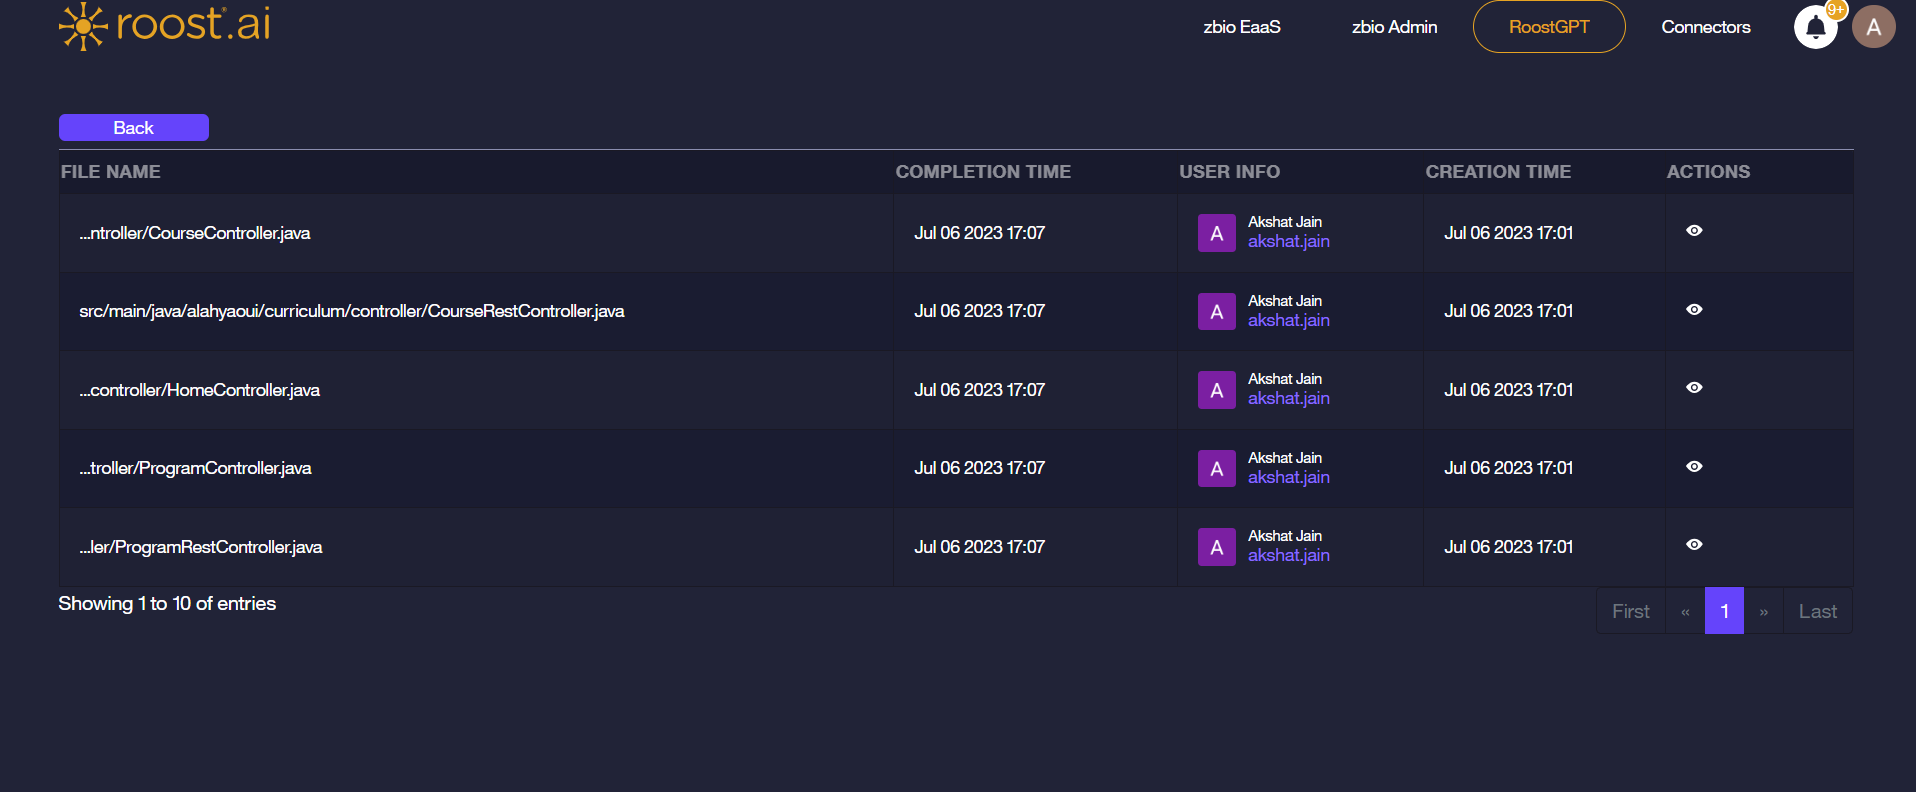
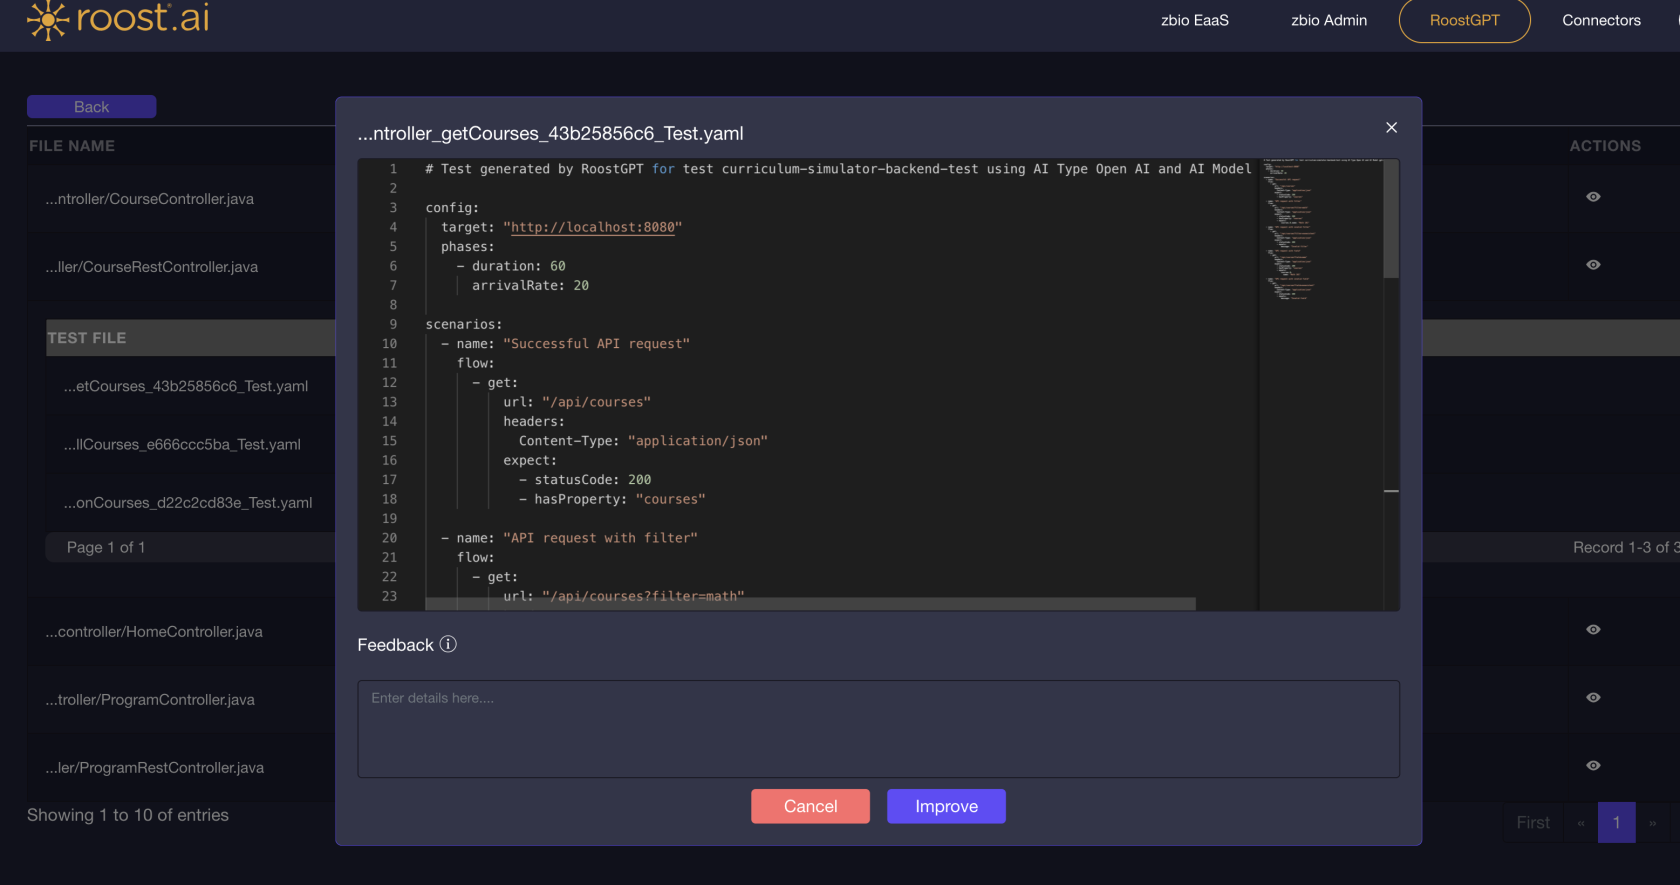
on the Click of eye icon in Actions, it will show you the test Files and Corresponding Actions. In the Actions, on click of Analyze and Improve it will open the modal which will show you the test and ask for the feedback for improvement of the test.
On click of download icon, it will download the test file generated.