Quickstart
Choose how you want to use RoostGPT and follow the path below to generate your first test in minutes.
- Web UI
- CLI
- VS Code / IDE
Web UI
The Web UI is the fastest way to get started — no installation required.
Step 1: Sign In
Go to app.roost.ai or your self-hosted instance at https://<your-domain>. Sign in using Google, GitHub, Microsoft, Auth0, or OTP.
If you don't have an account, sign up for a free trial at app.roost.ai/tryRoostAI.
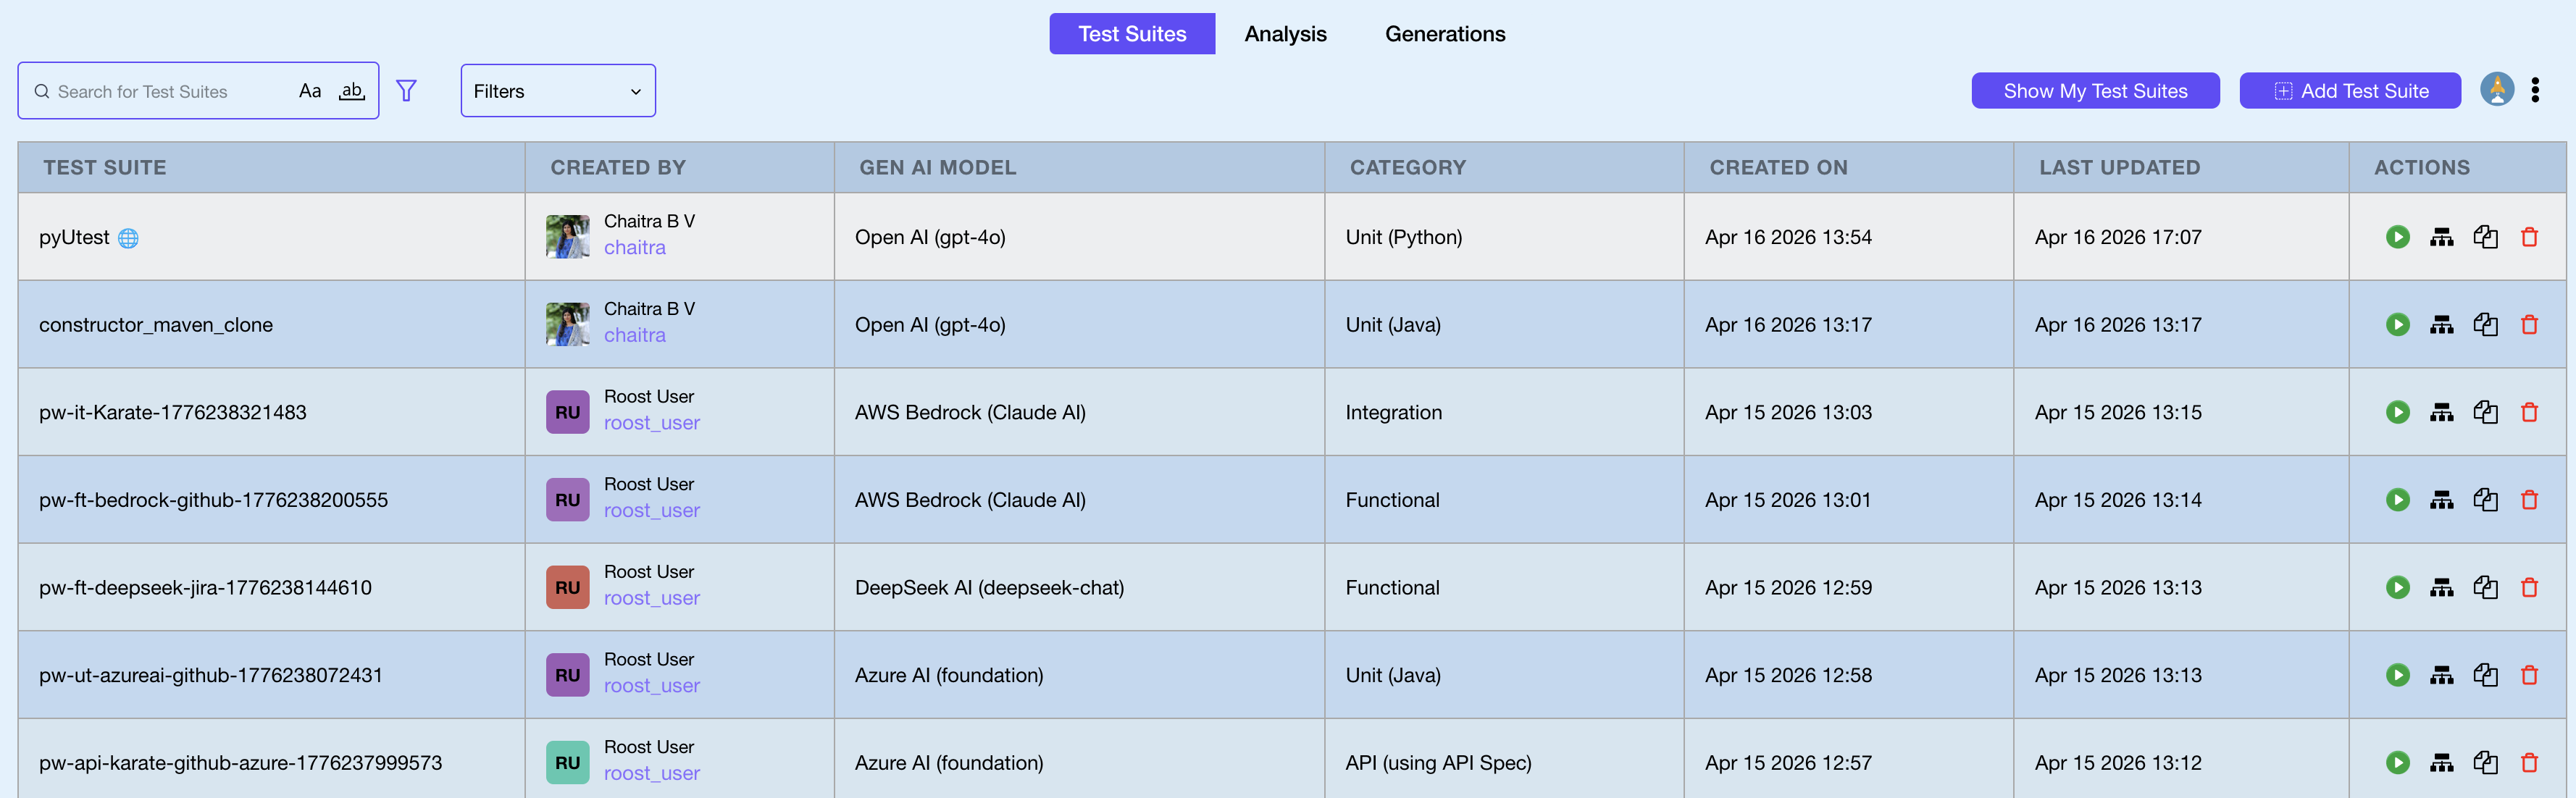
Step 2: Create a Test Suite
From the Test Suites dashboard, click Add Test Suite in the top-right corner.
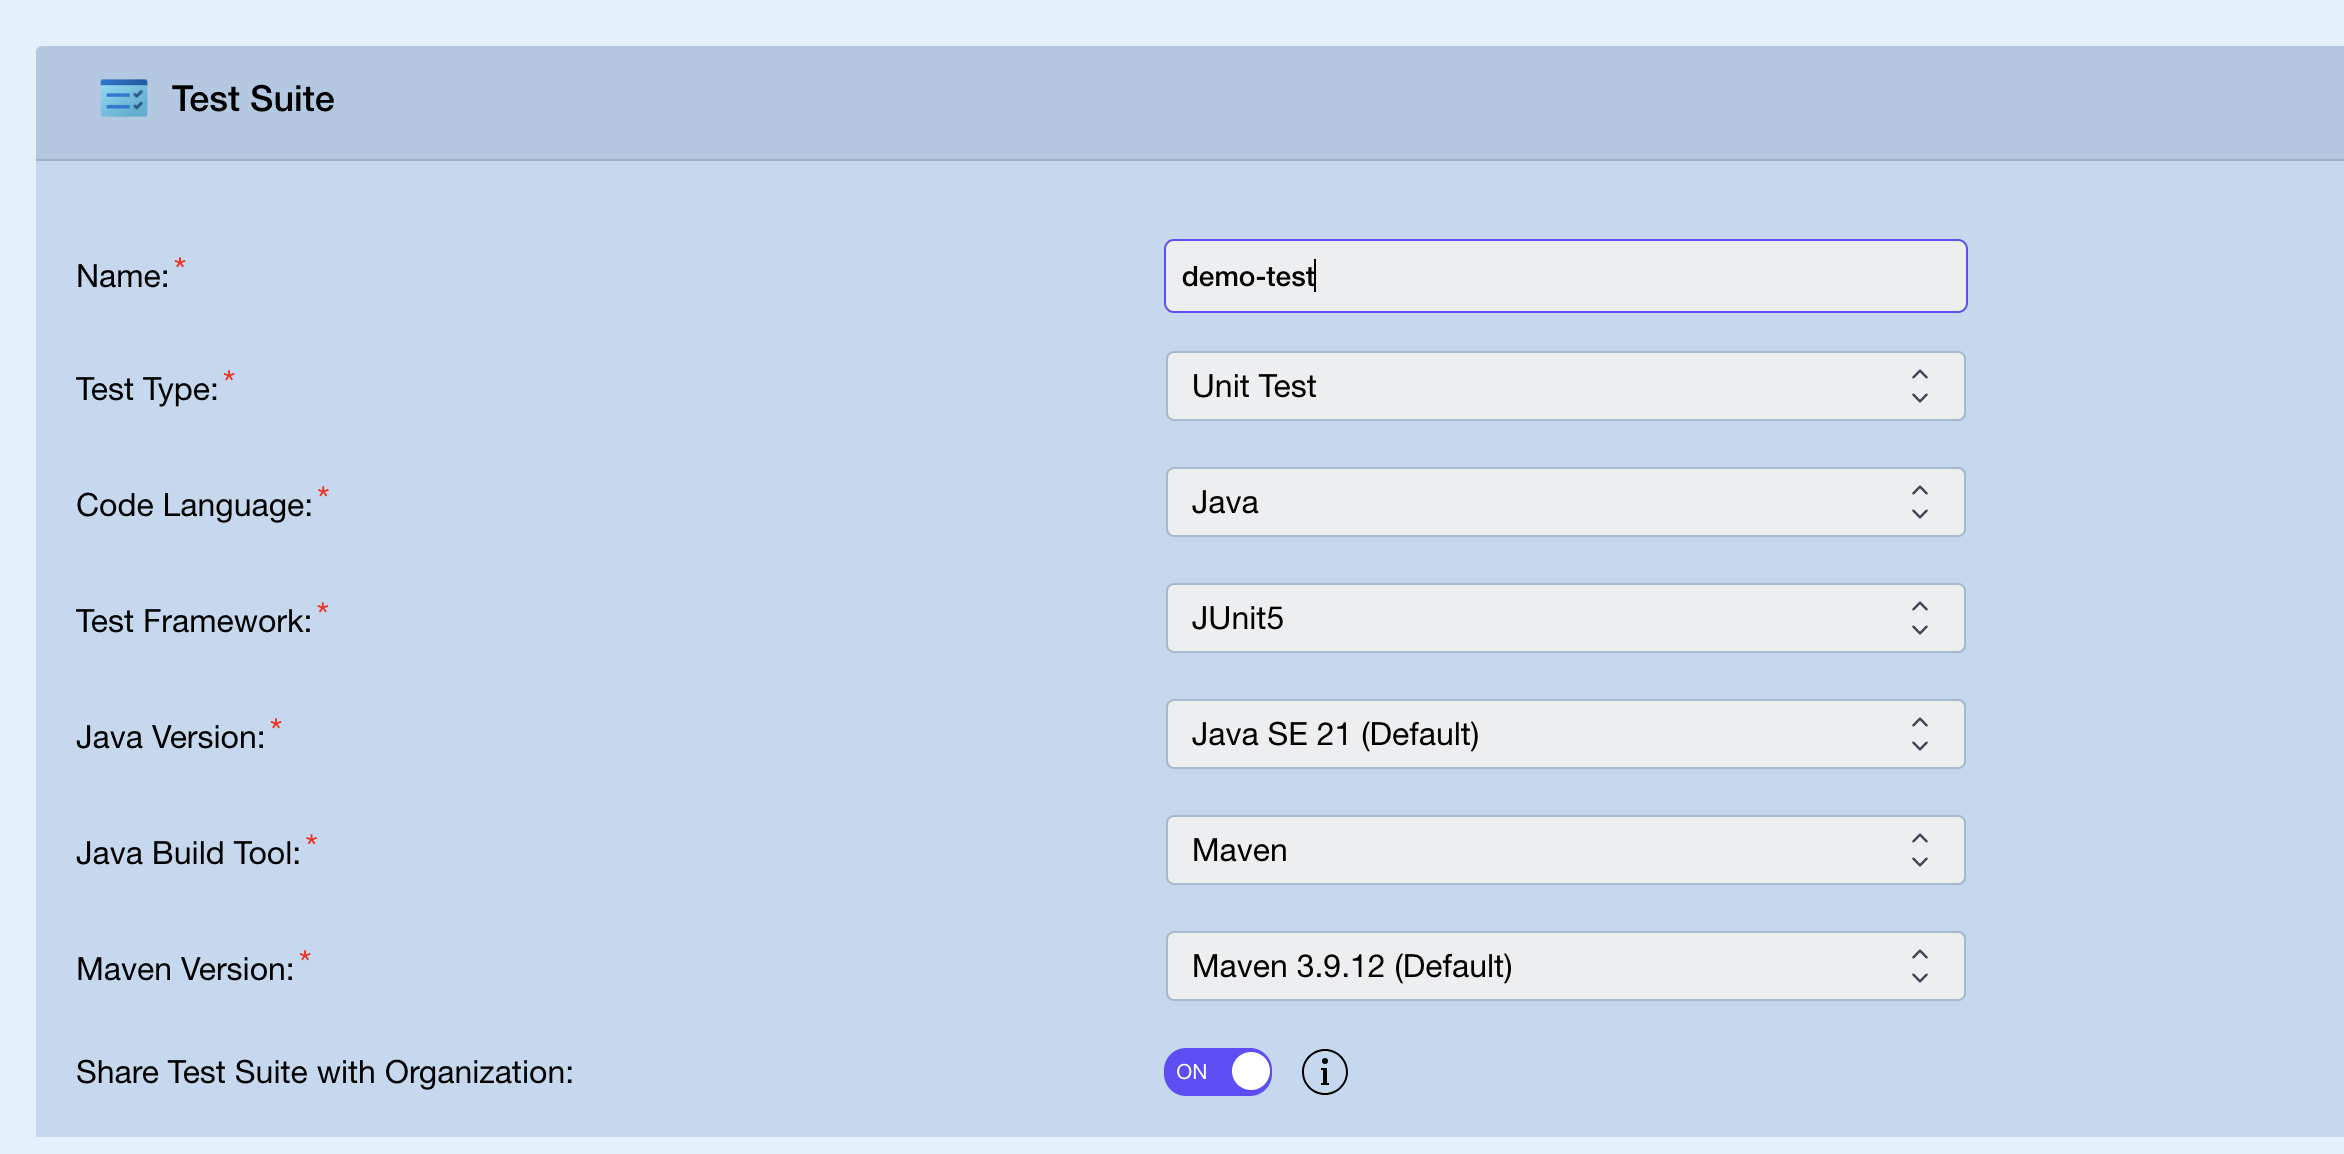
Step 3: Fill In General Information
In the Test Suite form, configure the basics:
| Field | Description |
|---|---|
| Name | A unique name for this test suite |
| Test Type | Unit Test, API Test, Integration Test, or Functional Test |
| Code Language | Java, Python, Go, or C# |
| Test Framework | Auto-populated based on language (e.g. JUnit5, pytest, gotest, NUnit) |
| Language Version | Runtime version (e.g. Java SE 21) |
| Build Tool | Maven or Gradle (Java only) |
| Share with Organization | Toggle on to make this suite visible to your whole team |
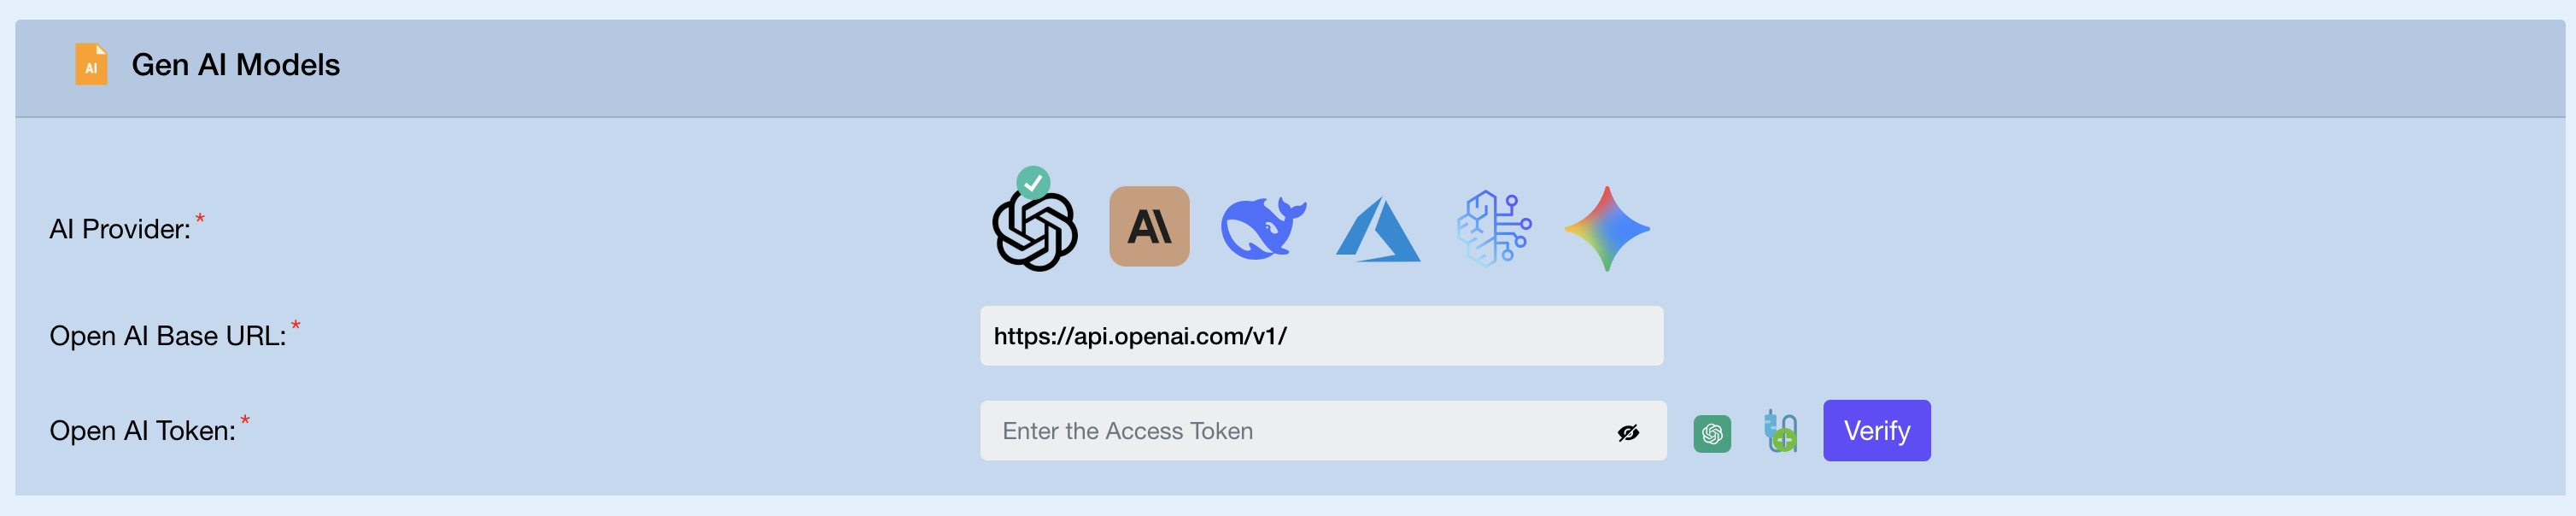
Step 4: Configure the AI Model
In the Gen AI Models section, select your provider and enter credentials directly.
- Click the provider icon — OpenAI, Claude, Azure AI, Bedrock, DeepSeek, or Gemini
- Enter the API key (and base URL if applicable)
- Click Verify to confirm the credentials are valid
See AI Provider Configuration for provider-specific field details.
Step 5: Configure the Code Repository
In the Code Repositories section, select your Git platform and enter credentials directly.
- Click the platform icon — GitHub, GitLab, Bitbucket, or Azure DevOps
- Select Cloud or Enterprise (self hosted)
- Enter your personal access token
- Click Verify to confirm access
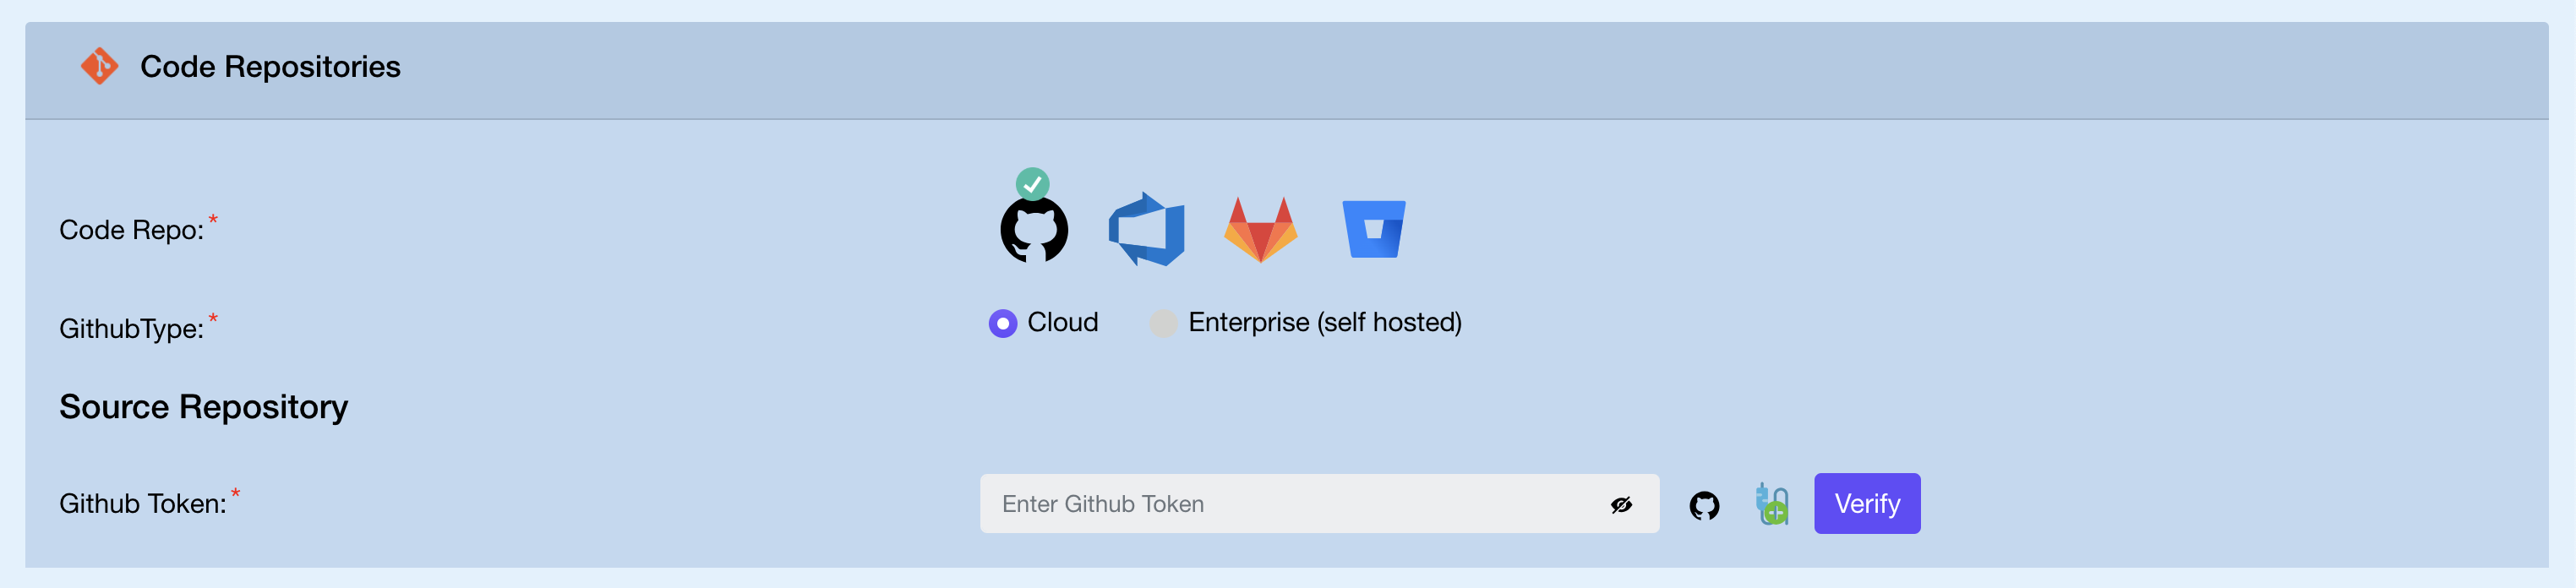
See Git Platform Configuration for token scopes and setup.
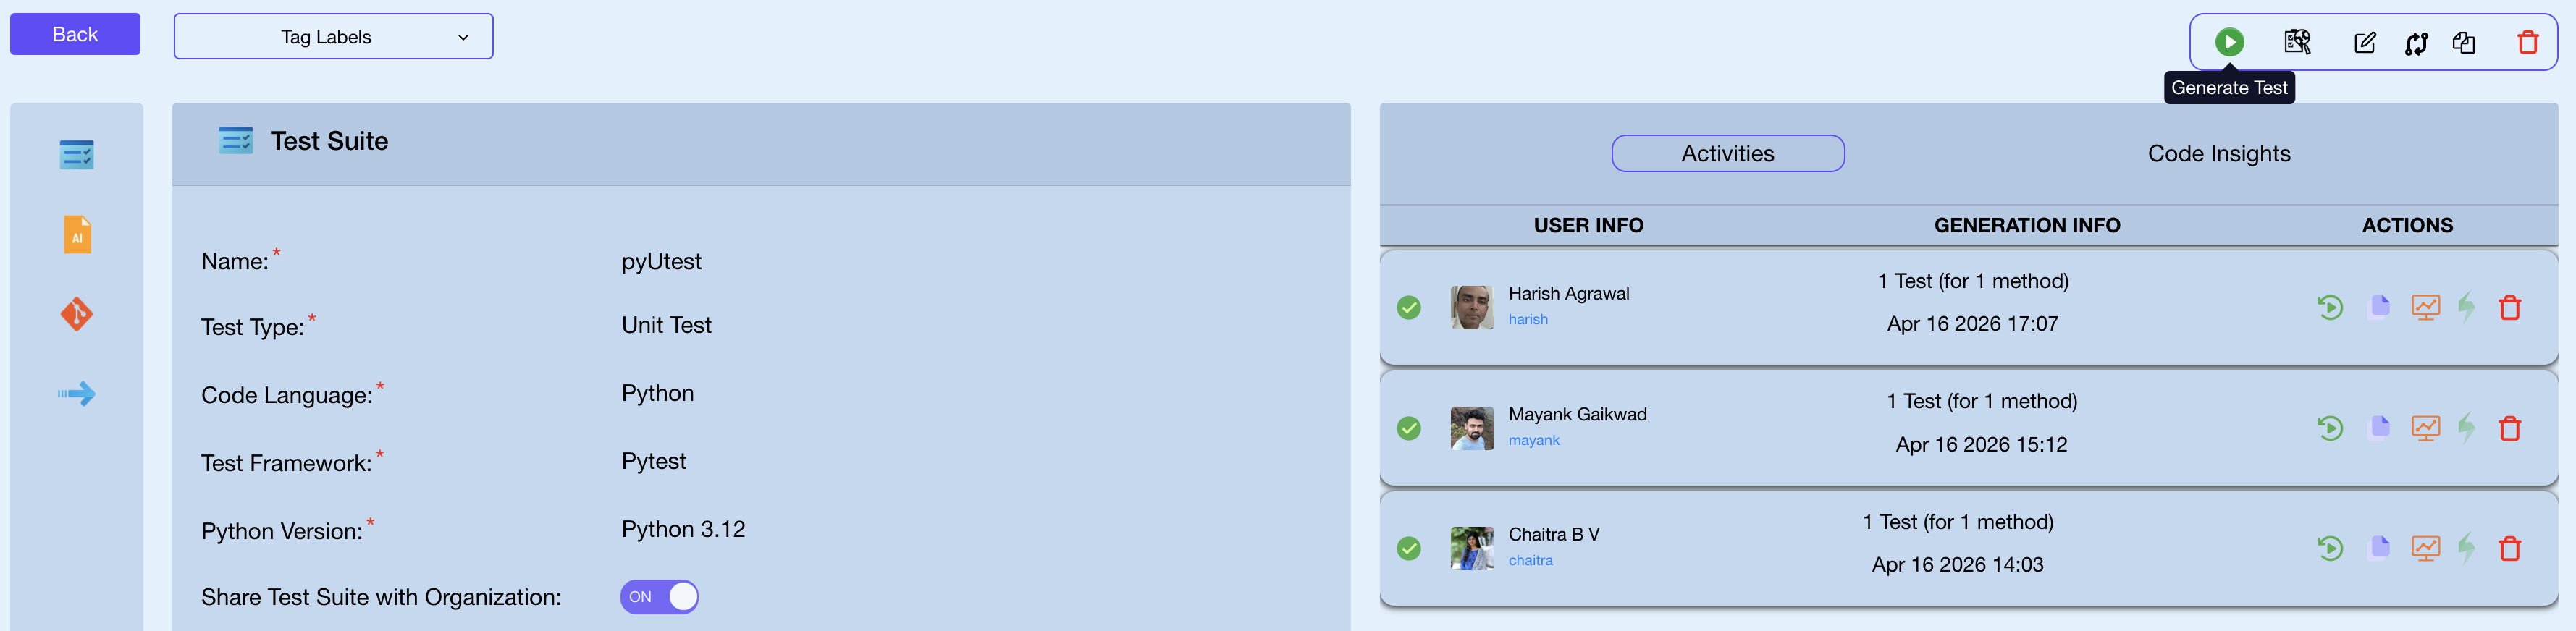
Step 6: Save and Generate
Once all sections are complete, click Save to store the test suite configuration. You can also download the configuration using the download button.

After saving, open the test suite and click Generate Test in the top-right corner. RoostGPT analyzes your repository, calls the AI model, generates tests, and opens a Pull Request with the results. The Activities panel tracks each generation run.
What's Next?
- Configure Webhooks — trigger generation automatically on push or PR events
- Multiple Test Flow — chain Unit → API → Integration from a single Jira story
- Self-Hosted Deployment — run RoostGPT inside your own network
CLI
The CLI runs locally on your machine with no hosted instance required. Configure it via a .env file and generate tests from any terminal or CI/CD pipeline.
Step 1: Install the CLI
macOS / Linux
curl https://raw.githubusercontent.com/roost-io/roost-support/master/roostgpt.sh | sudo bash -
Windows
Download roostgpt-win.exe and add it to your PATH.
Verify the installation:
roostgpt test --help
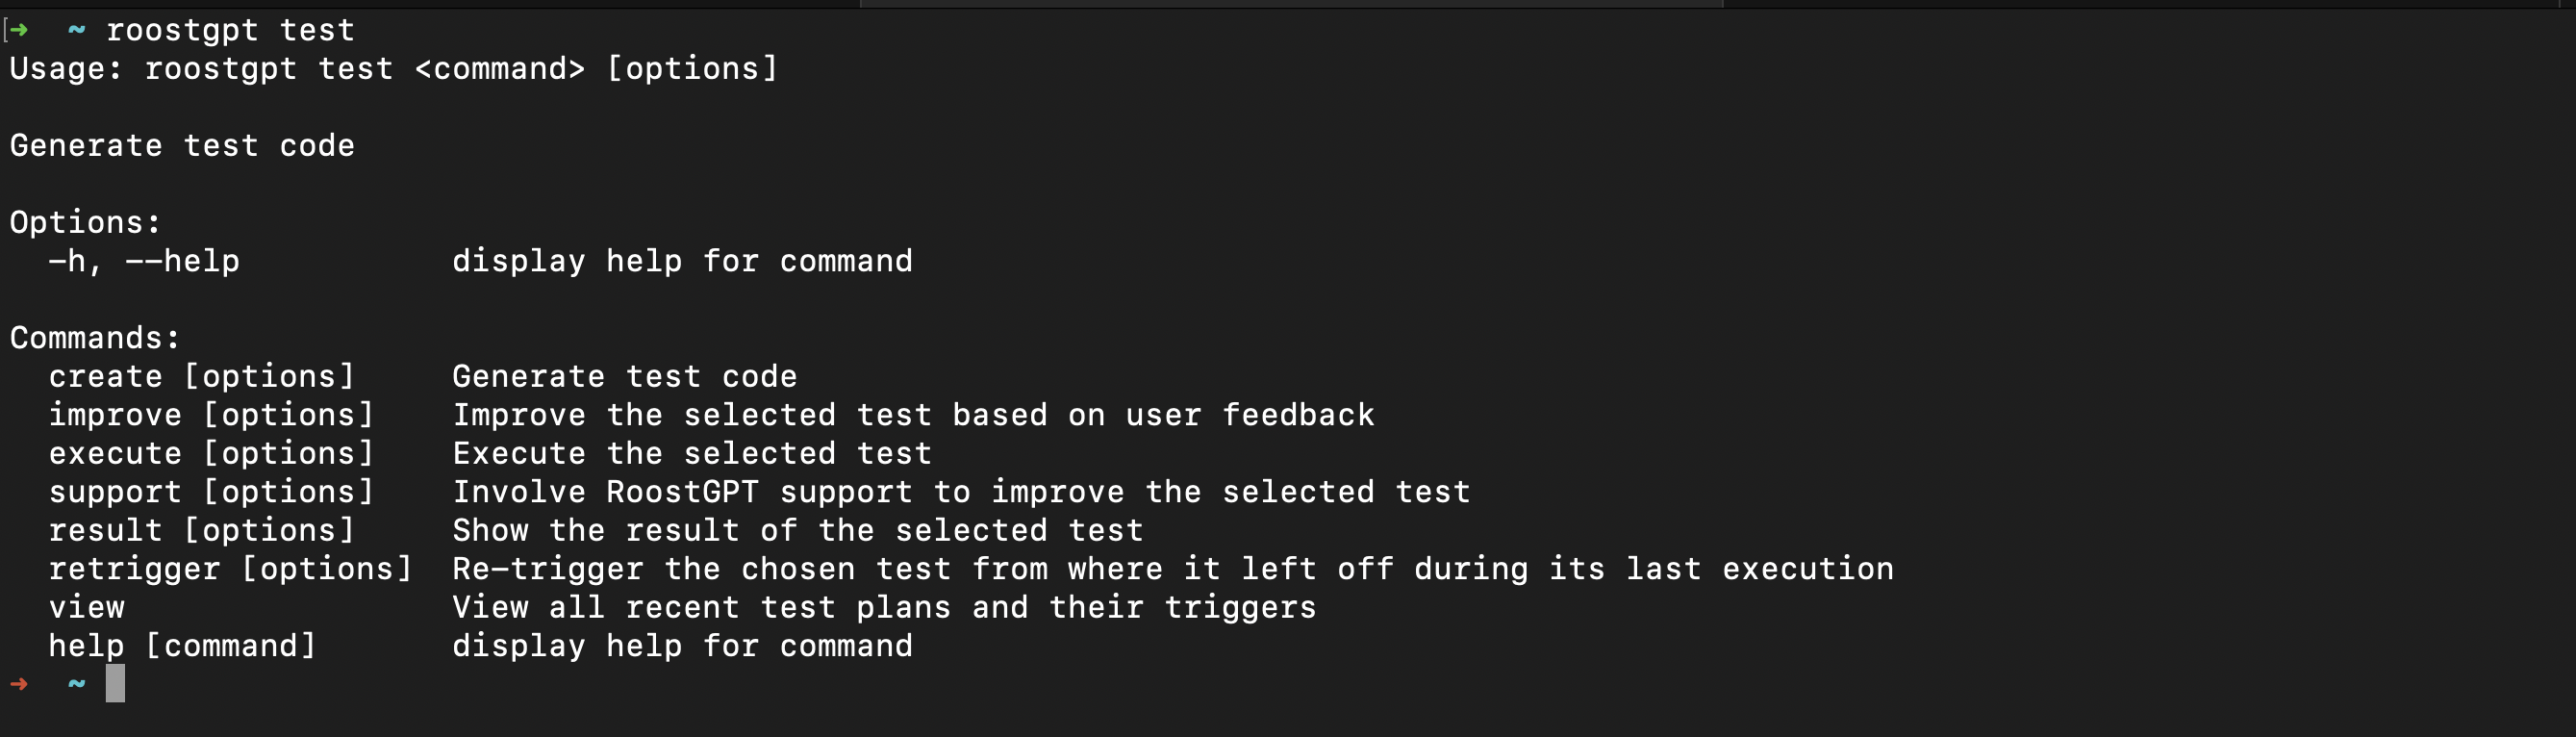
The roostgpt test command exposes the following subcommands:
| Subcommand | Description |
|---|---|
create | Generate tests for the configured source |
improve | Refine an existing test based on natural language feedback |
execute | Run a selected test |
support | Send logs for the selected trigger to the Roost team for analysis — use this when you need help diagnosing a failed or unexpected generation |
result | Select a past test run and view its full result dashboard |
retrigger | Select a test and re-run it from where it last stopped |
view | List all recent test triggers and their last-run timestamps |
Step 2: Create a .env Configuration File
The quickest way is to use the web form at app.roost.ai/gptCLIForm, which generates a pre-filled .env file. Alternatively, create one manually:
# Roost license
ROOST_TOKEN=your_roost_token
ROOST_DOMAIN=app.roost.ai

# AI provider
AI_TYPE=openai
OPENAI_API_KEY=sk-...
OPENAI_API_MODEL=gpt-4o

# Git source
GIT_TYPE=github
SOURCE_GIT_TOKEN=ghp_...
SOURCE_OWNER_NAME=your-org
SOURCE_REPO_NAME=your-repo
SOURCE_BASE_BRANCH=main

# Test configuration
TEST_LANGUAGE=java
TEST_TYPE=unit
Get your Roost token from app.roost.ai → My Profile.
See the CLI Reference for the full variable list and all supported providers.
Step 3: Generate Your First Test
Run from the directory containing your .env file:
roostgpt test create
Or specify a config file explicitly:
roostgpt test create -c path/to/test.env
RoostGPT reads the configuration, connects to your repository, calls the AI model, generates test files, and opens a Pull Request if Git output is configured.
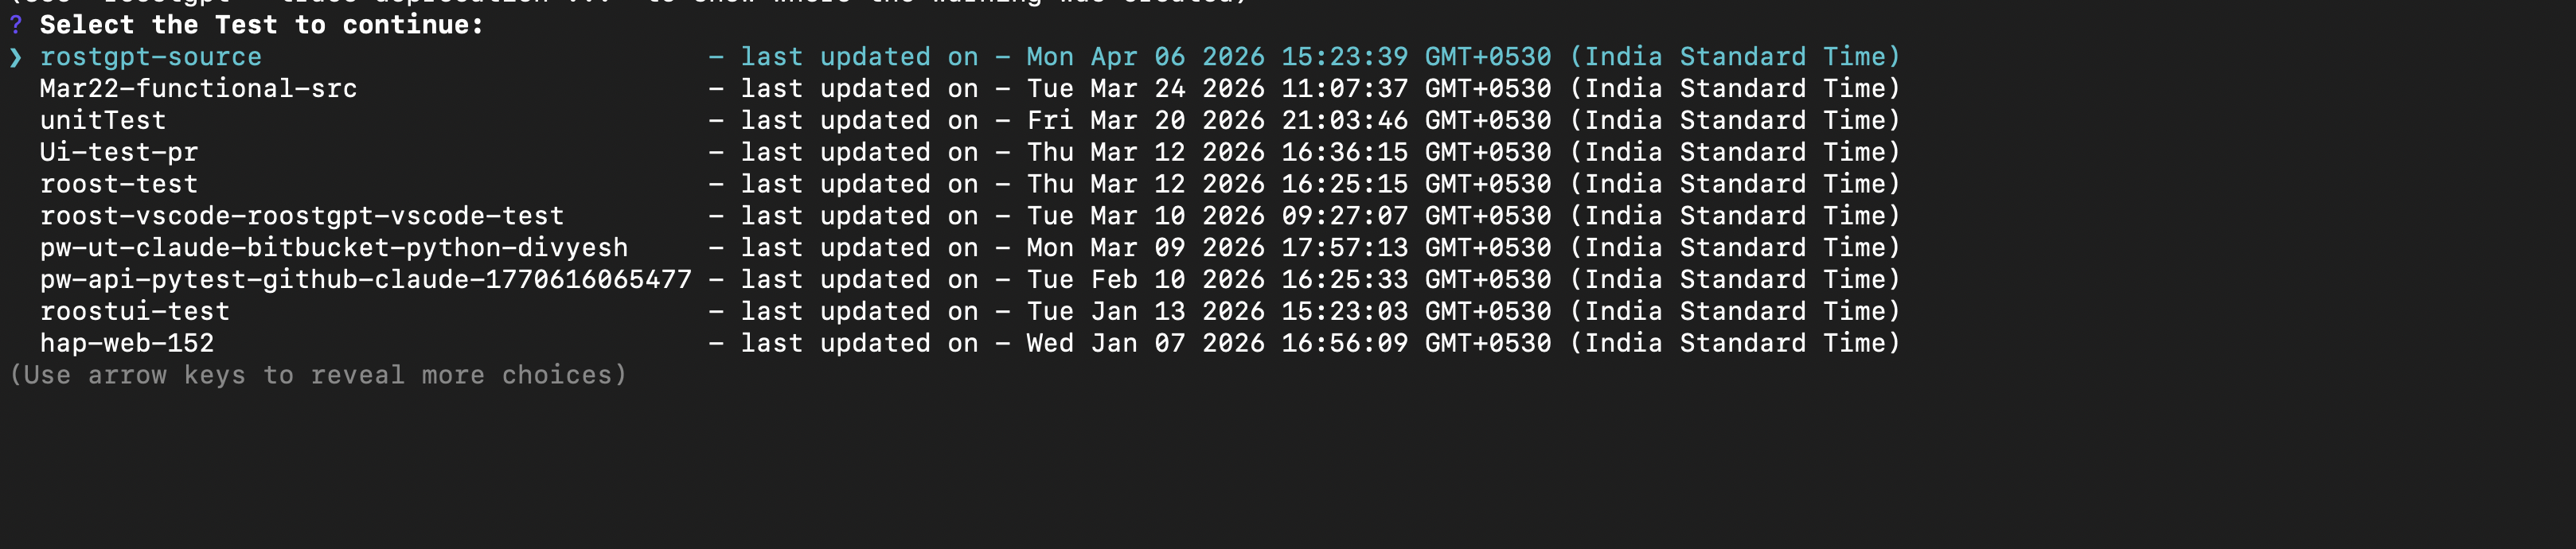
Step 4: Review the Results
Once generation completes, RoostGPT displays a full result dashboard in the terminal.
To revisit results, retrigger, or inspect a past run, use result, retrigger, or view — each prompts you to select from your recent test suites using the arrow keys:
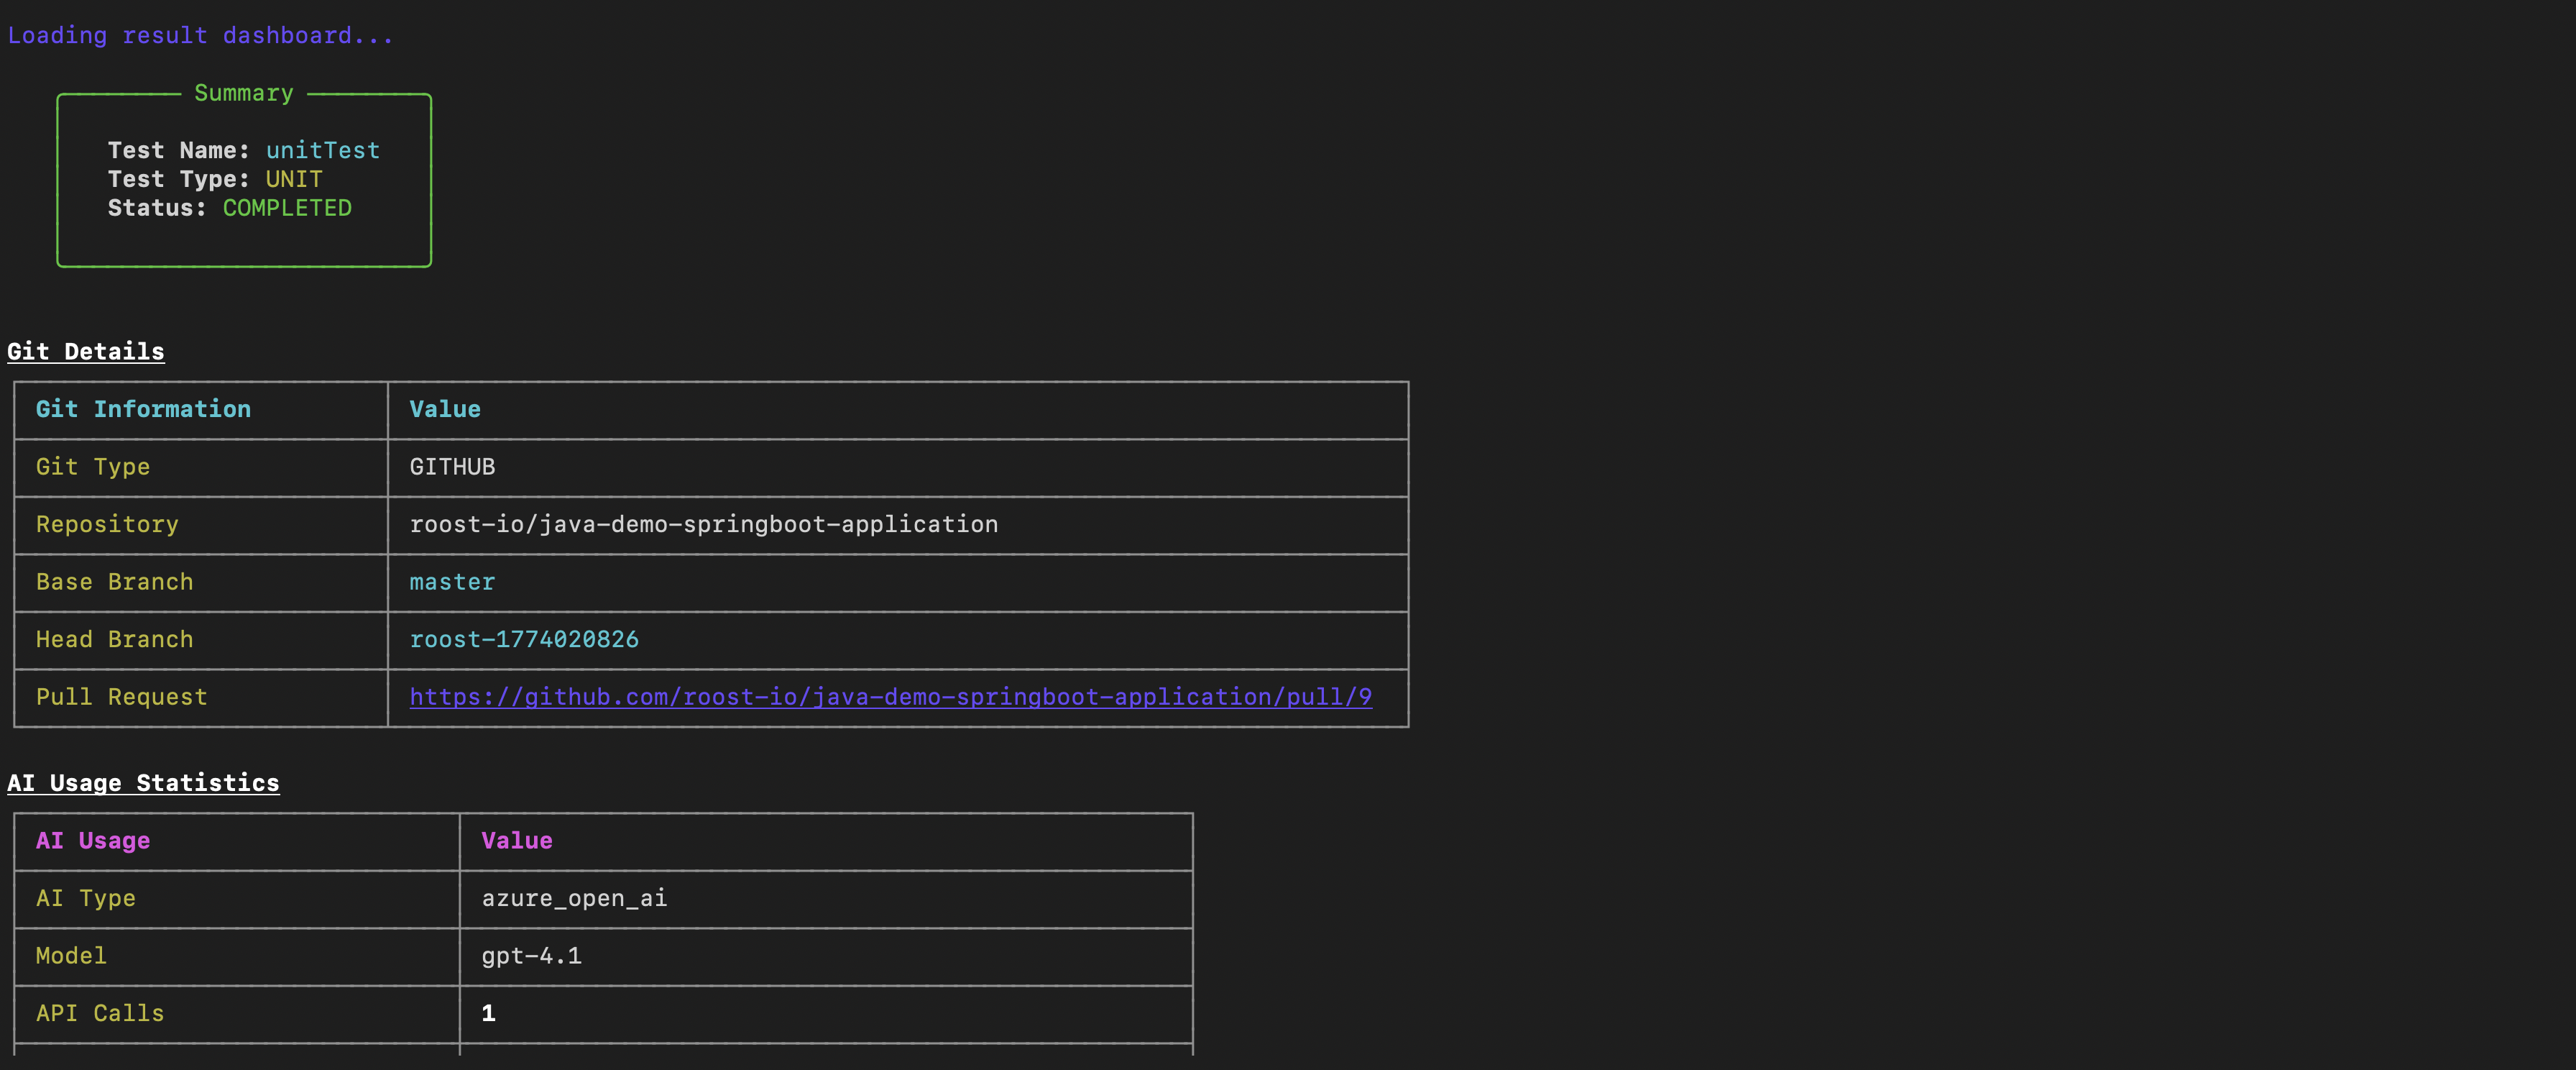
The dashboard contains five sections:
Summary — High-level outcome of the run.
| Field | Description |
|---|---|
| Test Name | Name of the test suite |
| Test Type | Type of tests generated (e.g. Unit) |
| Status | COMPLETED, FAILED, or IN_PROGRESS |
Test Metrics — Detailed coverage and quality statistics.
| Metric | Description |
|---|---|
| Methods Scanned | Total methods analysed |
| Methods Successful | Methods for which tests were generated successfully |
| Files Scanned / Total Files | Source files processed |
| Total Test Files | Number of test files written |
| Successful Tests | Tests that compiled and passed |
| Compilation Errors | Tests that failed to compile |
| Runtime Errors | Tests that compiled but failed at runtime |
| Skipped Methods | Methods excluded from generation |
Generated Files — Per-source-file breakdown listing each method with a ✔ (success) or ❌ (failure) status and the path of the generated test file.
Configuration — The full set of parameters used for the run: test type, language, framework, build tool, packages, functions, and verification settings.
Git Details — Repository, base branch, head branch, and Pull Request URL.
AI Usage Statistics — Provider, model, and total API call count.
Open the Pull Request URL to review and merge the generated tests into your repository.
What's Next?
- CLI Reference — full command list and all
.envoptions - AI Provider Configuration — switch or configure providers
- Multiple Test Flow — chain Unit → API → Integration in a single run
VS Code Extension
Generate tests without leaving your editor. The RoostGPT sidebar panel gives you one-click access to every test type — Unit, API, Functional, and UI — scoped to your entire project or a single function.
Step 1: Install the Extension
Open VS Code and search for Roost GPT in the Extensions panel, or install directly from the marketplace:
Install RoostGPT on VS Code Marketplace
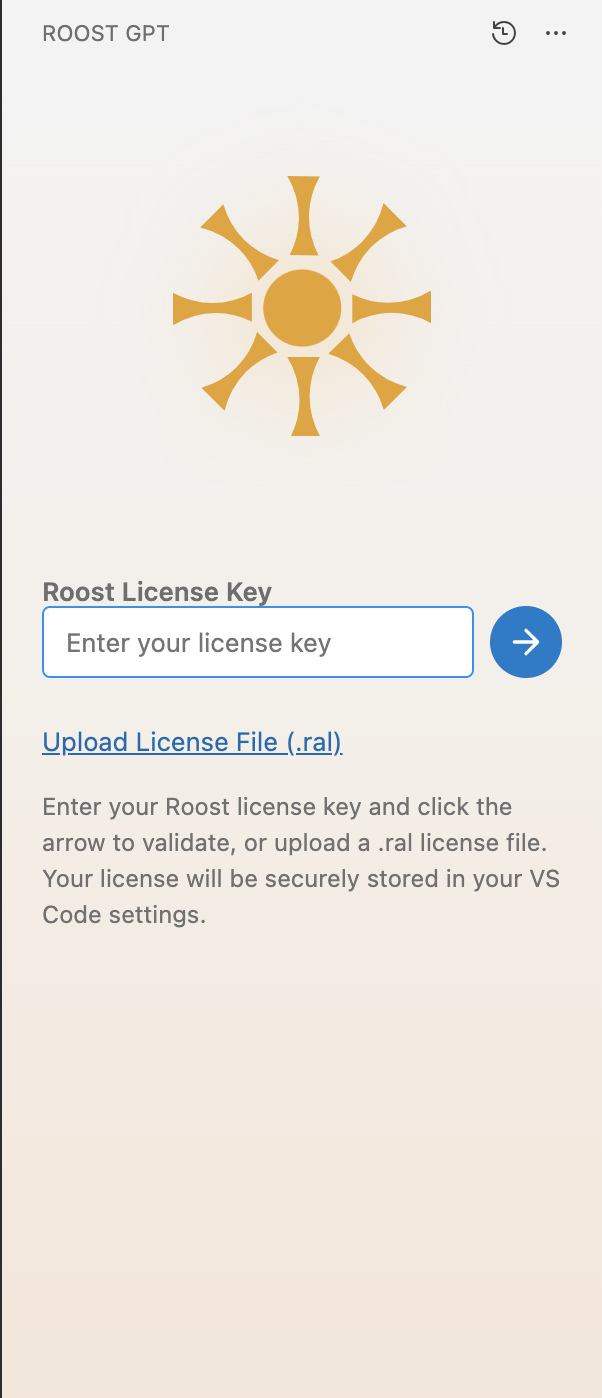
After installation, the Roost GPT panel appears in the Activity Bar. Open it and enter your Roost license key, then click the arrow to activate. You can also upload a .ral license file if your team distributes licenses that way.
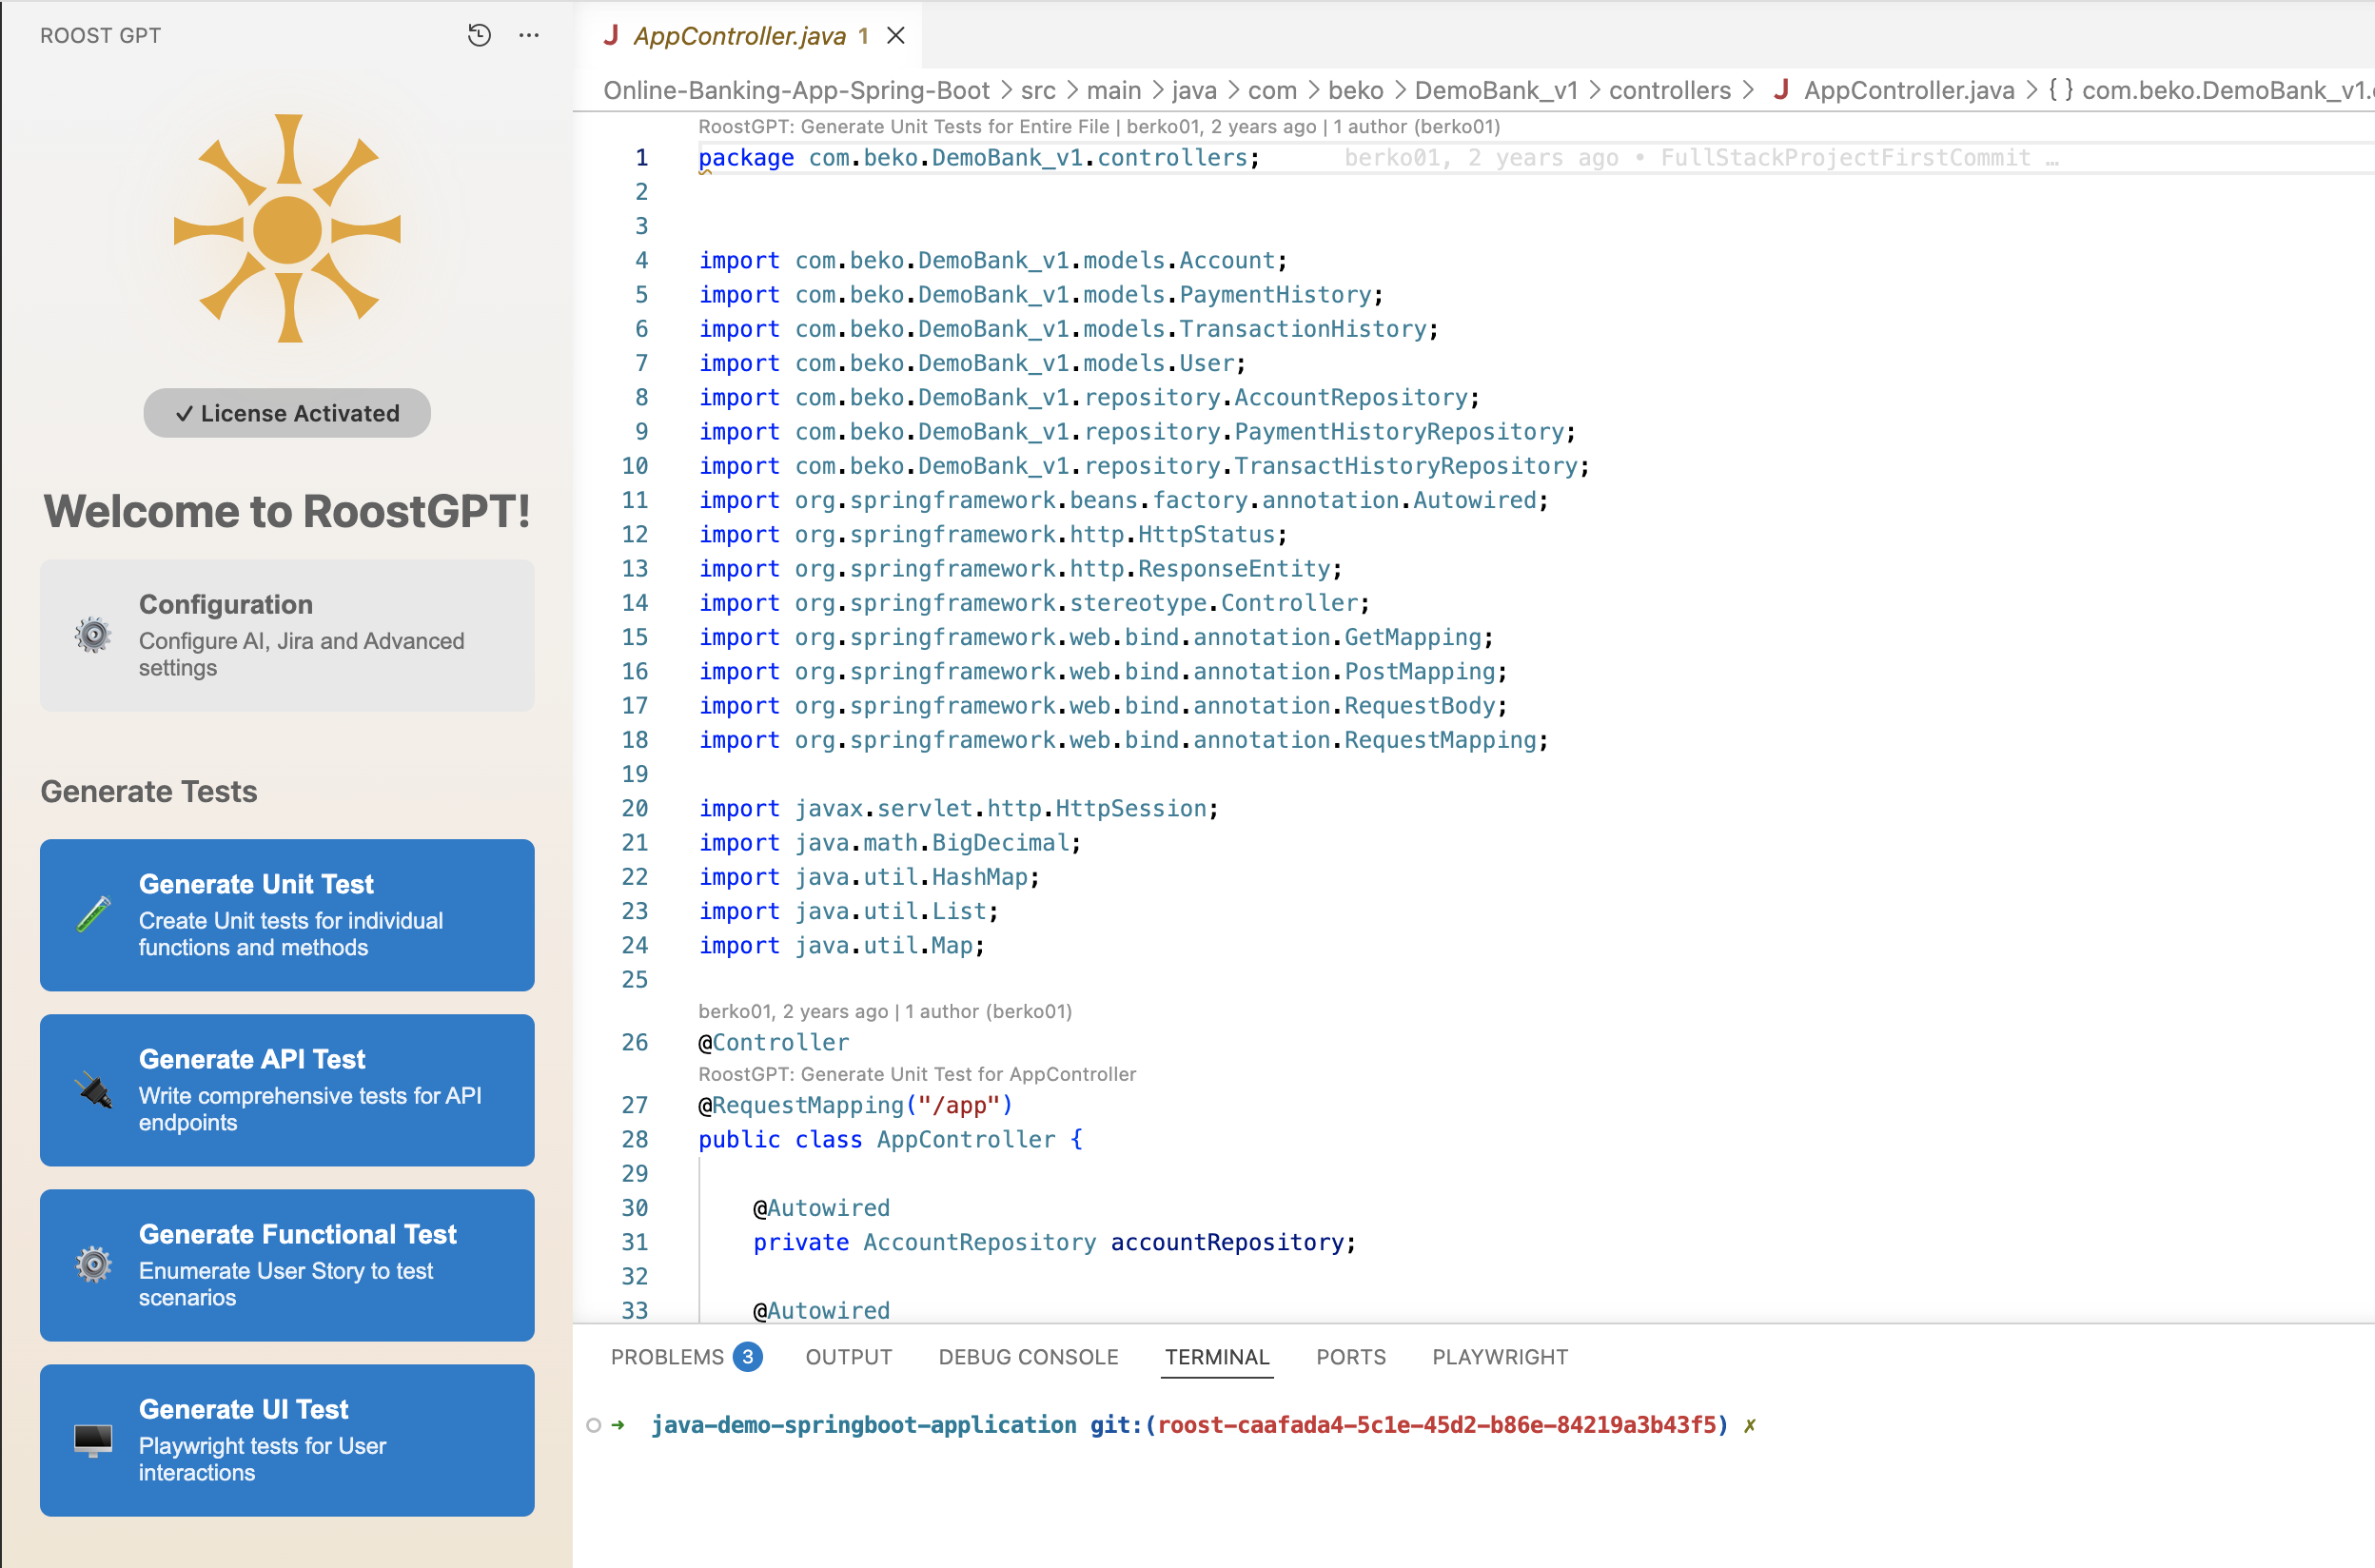
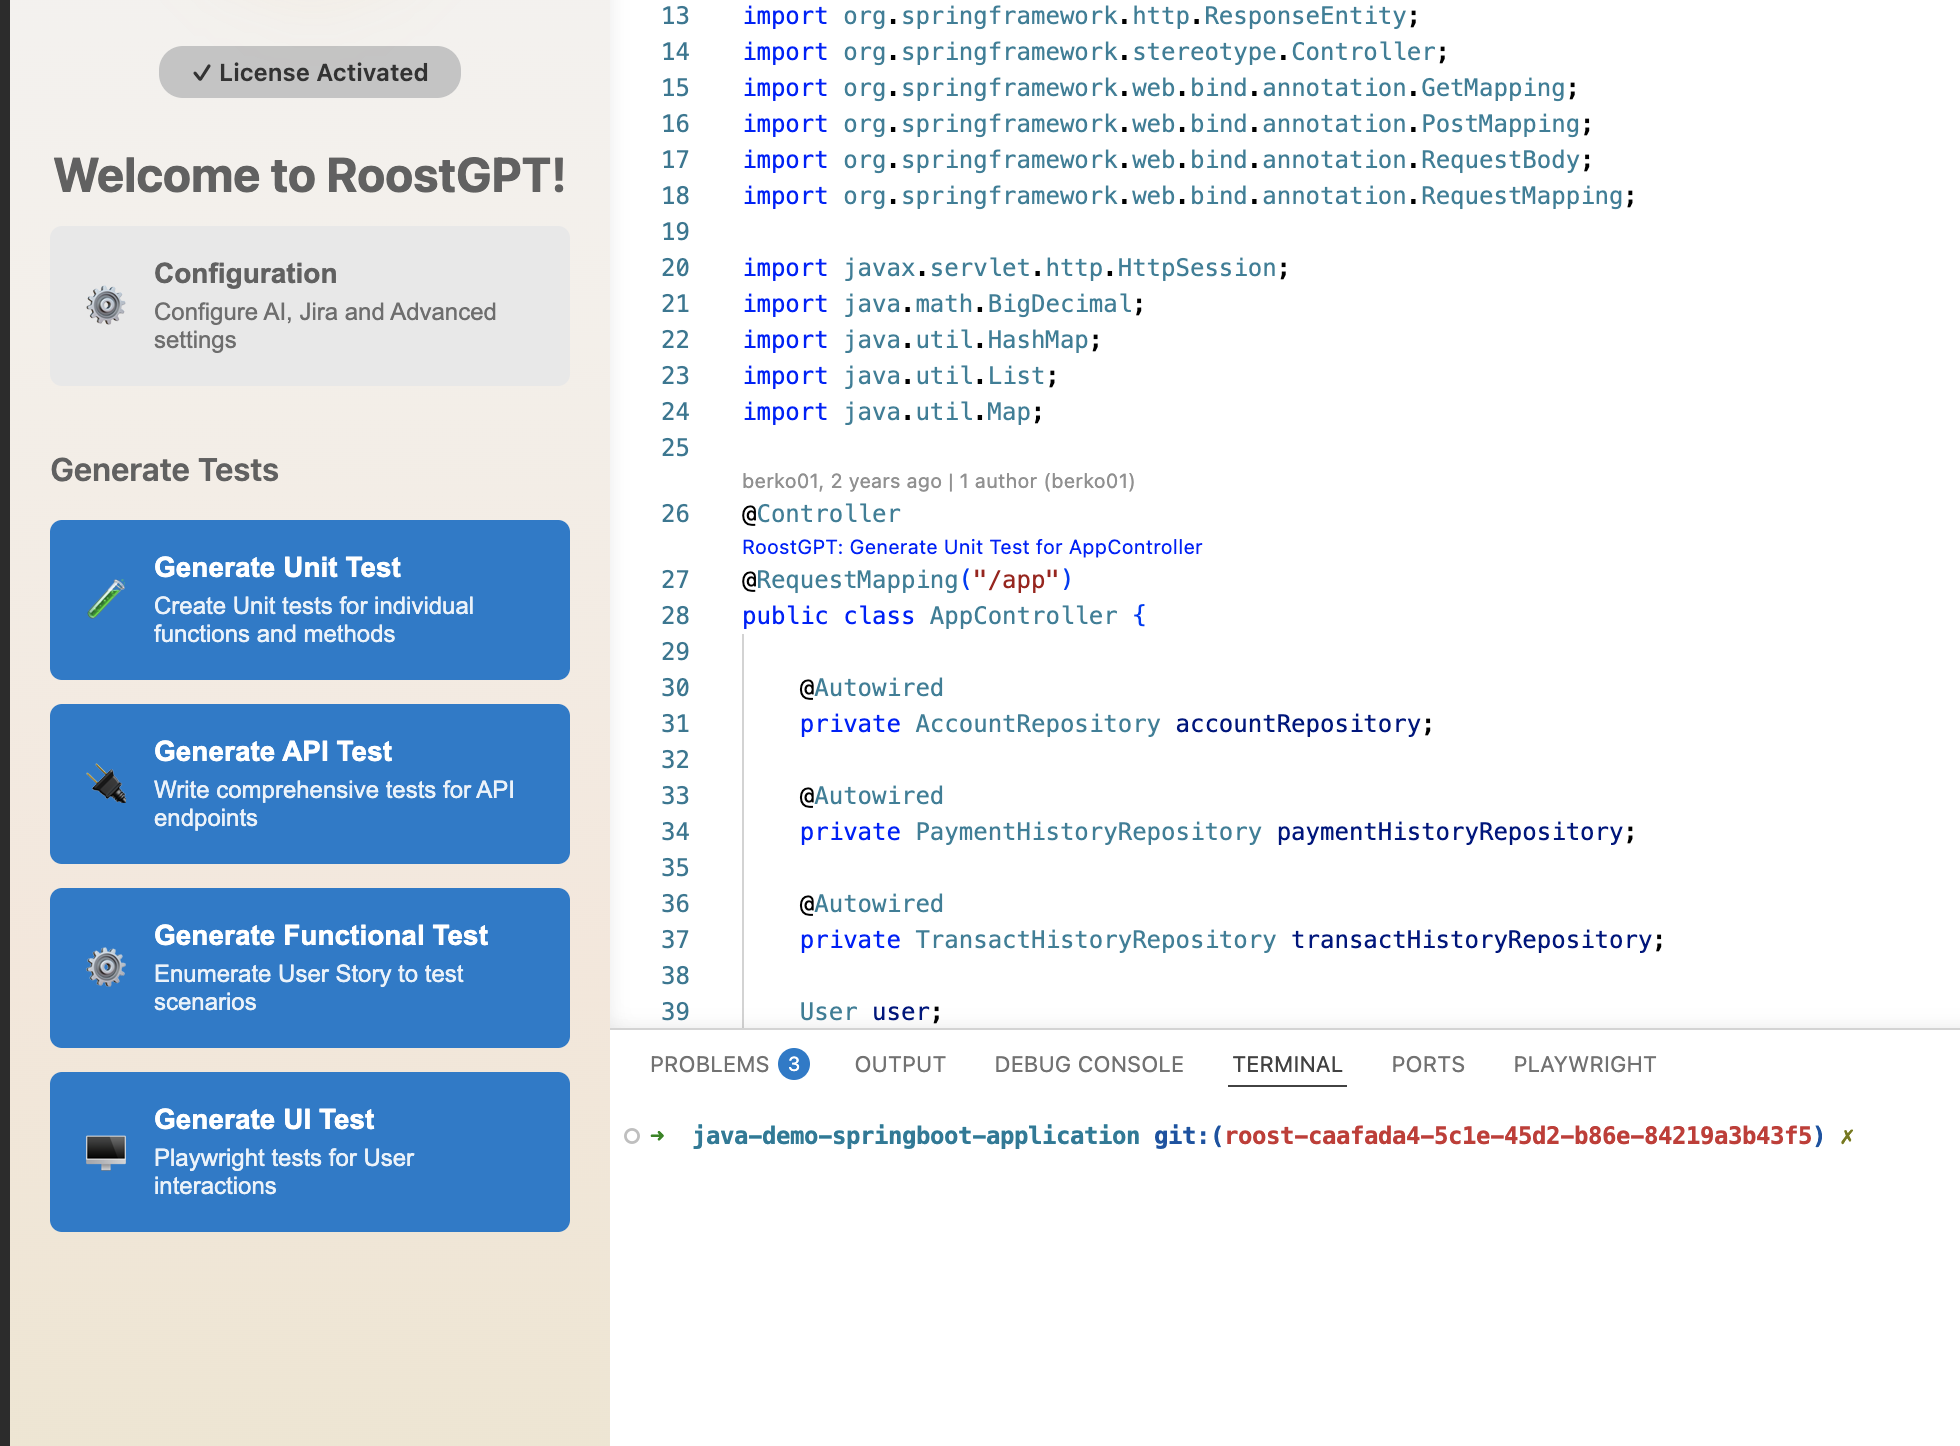
Step 2: Welcome Screen
Once your license is validated, the panel shows the Welcome to RoostGPT! screen with a Configuration link and four Generate Tests buttons — one for each supported test type.
Step 3: Configure Your AI Provider
Click Configuration → select the AI tab. Choose your AI provider from the Default AI Provider dropdown and enter the required credentials.
The example below shows AWS Bedrock AI selected. Credentials can be loaded from a CSV export, an AWS credentials file, or entered manually — Access Key ID, Secret Access Key, Session Token (optional), Region, and Model Type.
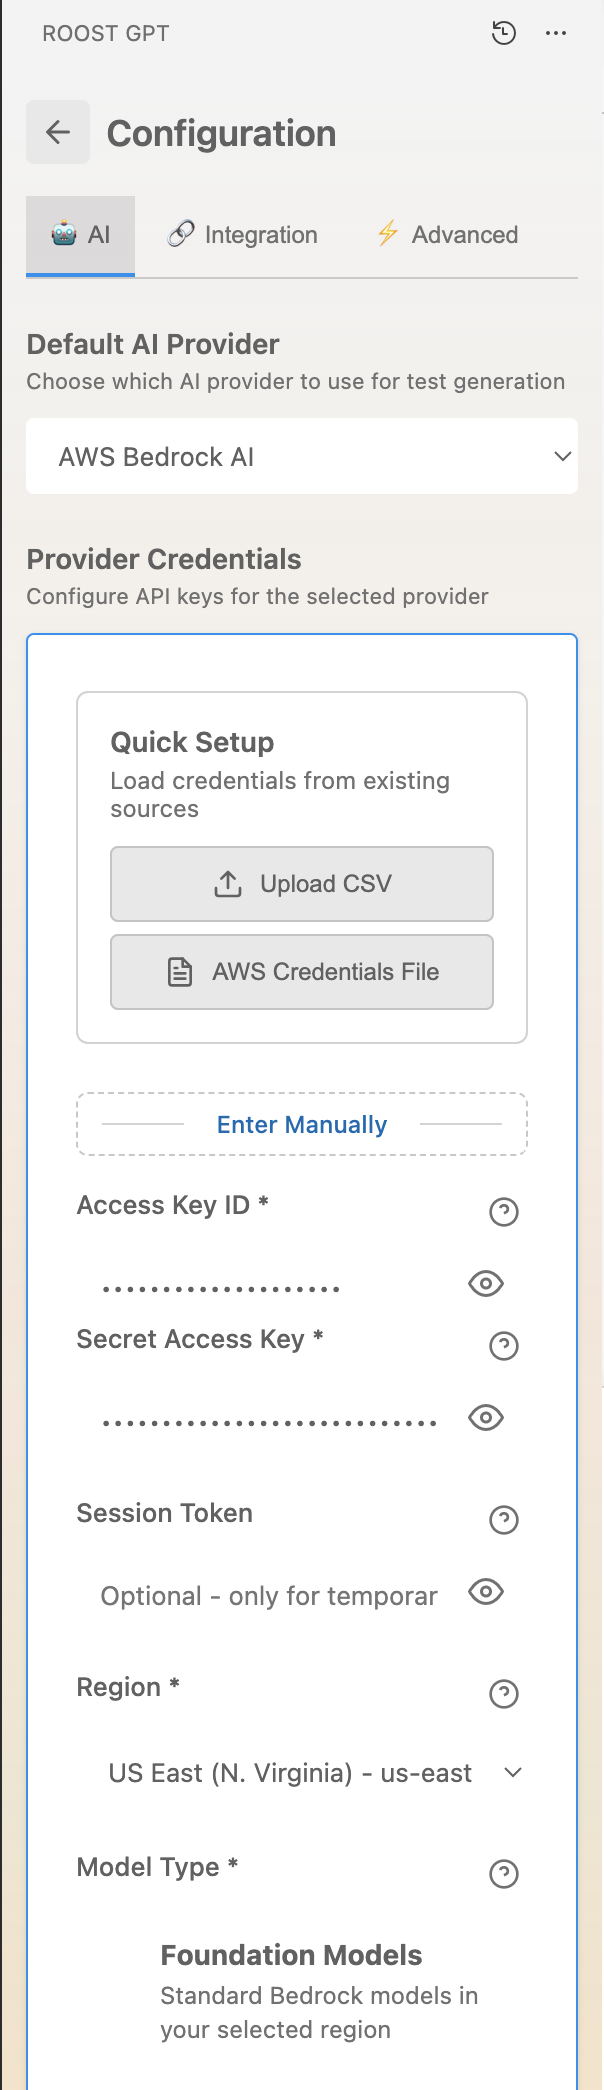
Supported providers include OpenAI, Anthropic Claude, Azure OpenAI, Google Gemini, and AWS Bedrock. See AI Provider Configuration for provider-specific field details.
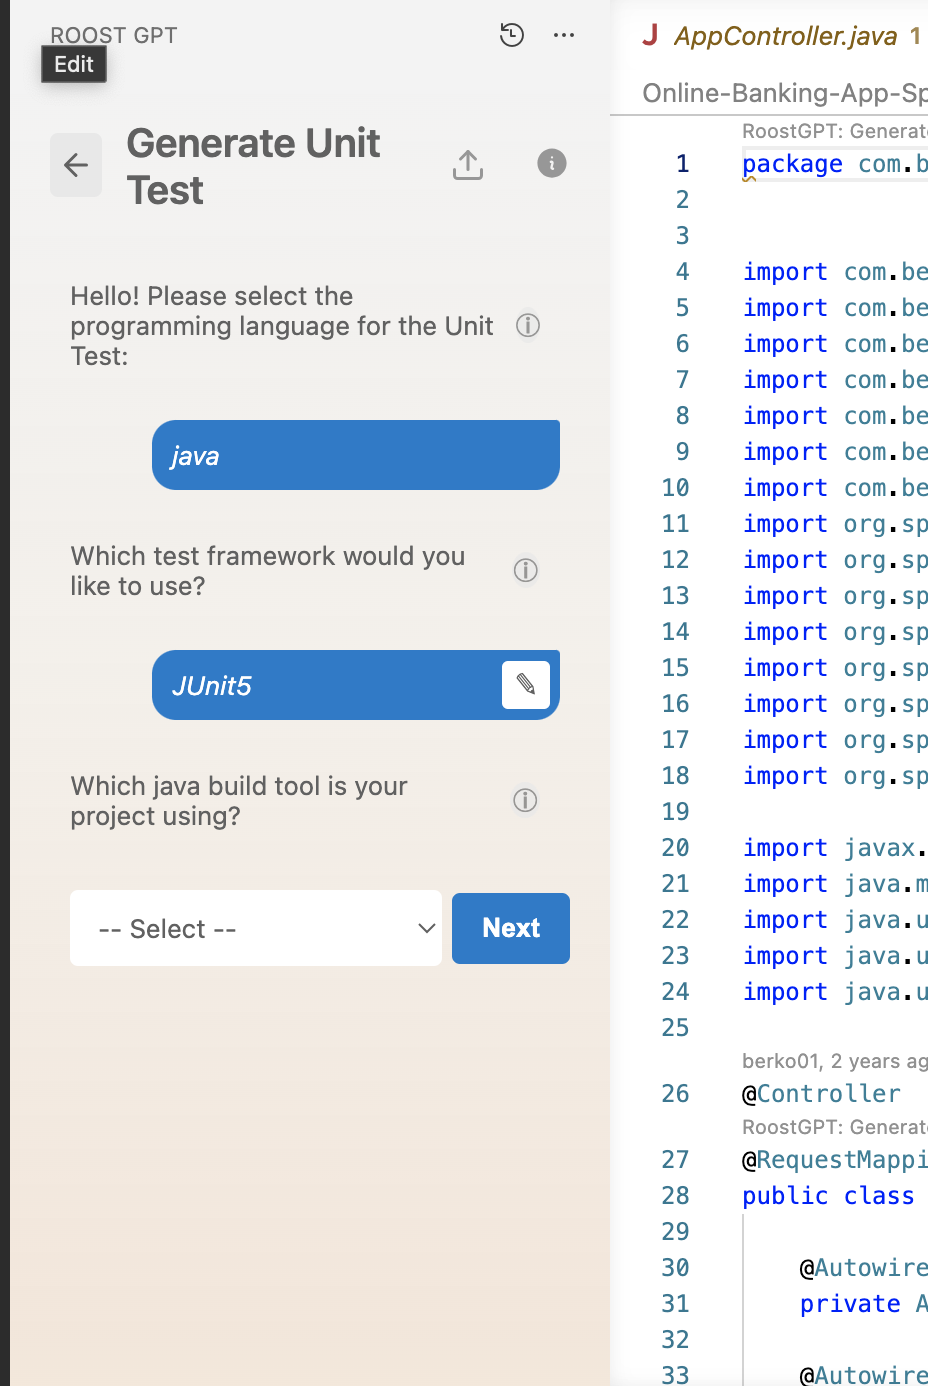
Step 4: Generate Your First Test
From the Welcome screen, click Generate Unit Test (or any other test type). A step-by-step wizard opens in the panel:
- Language — select your project language (Java, Python, Go, or C#)
- Framework — choose a test framework (e.g. JUnit5 for Java, pytest for Python)
- Build tool — select your build system (Maven, Gradle, etc.)
Click Next after each step. RoostGPT then analyzes your repository, calls the AI model, and generates the test files.
Step 5: Scope Generation to a Class or Function
You can target generation at a specific class or function rather than the entire project.
Class-level: Open a source file. The panel detects the active file and scopes generation to that class when you click a Generate button.
Function-level: Place your cursor inside a specific function. RoostGPT reads the function in focus and generates tests for that method only — useful for iterating on a single piece of logic.
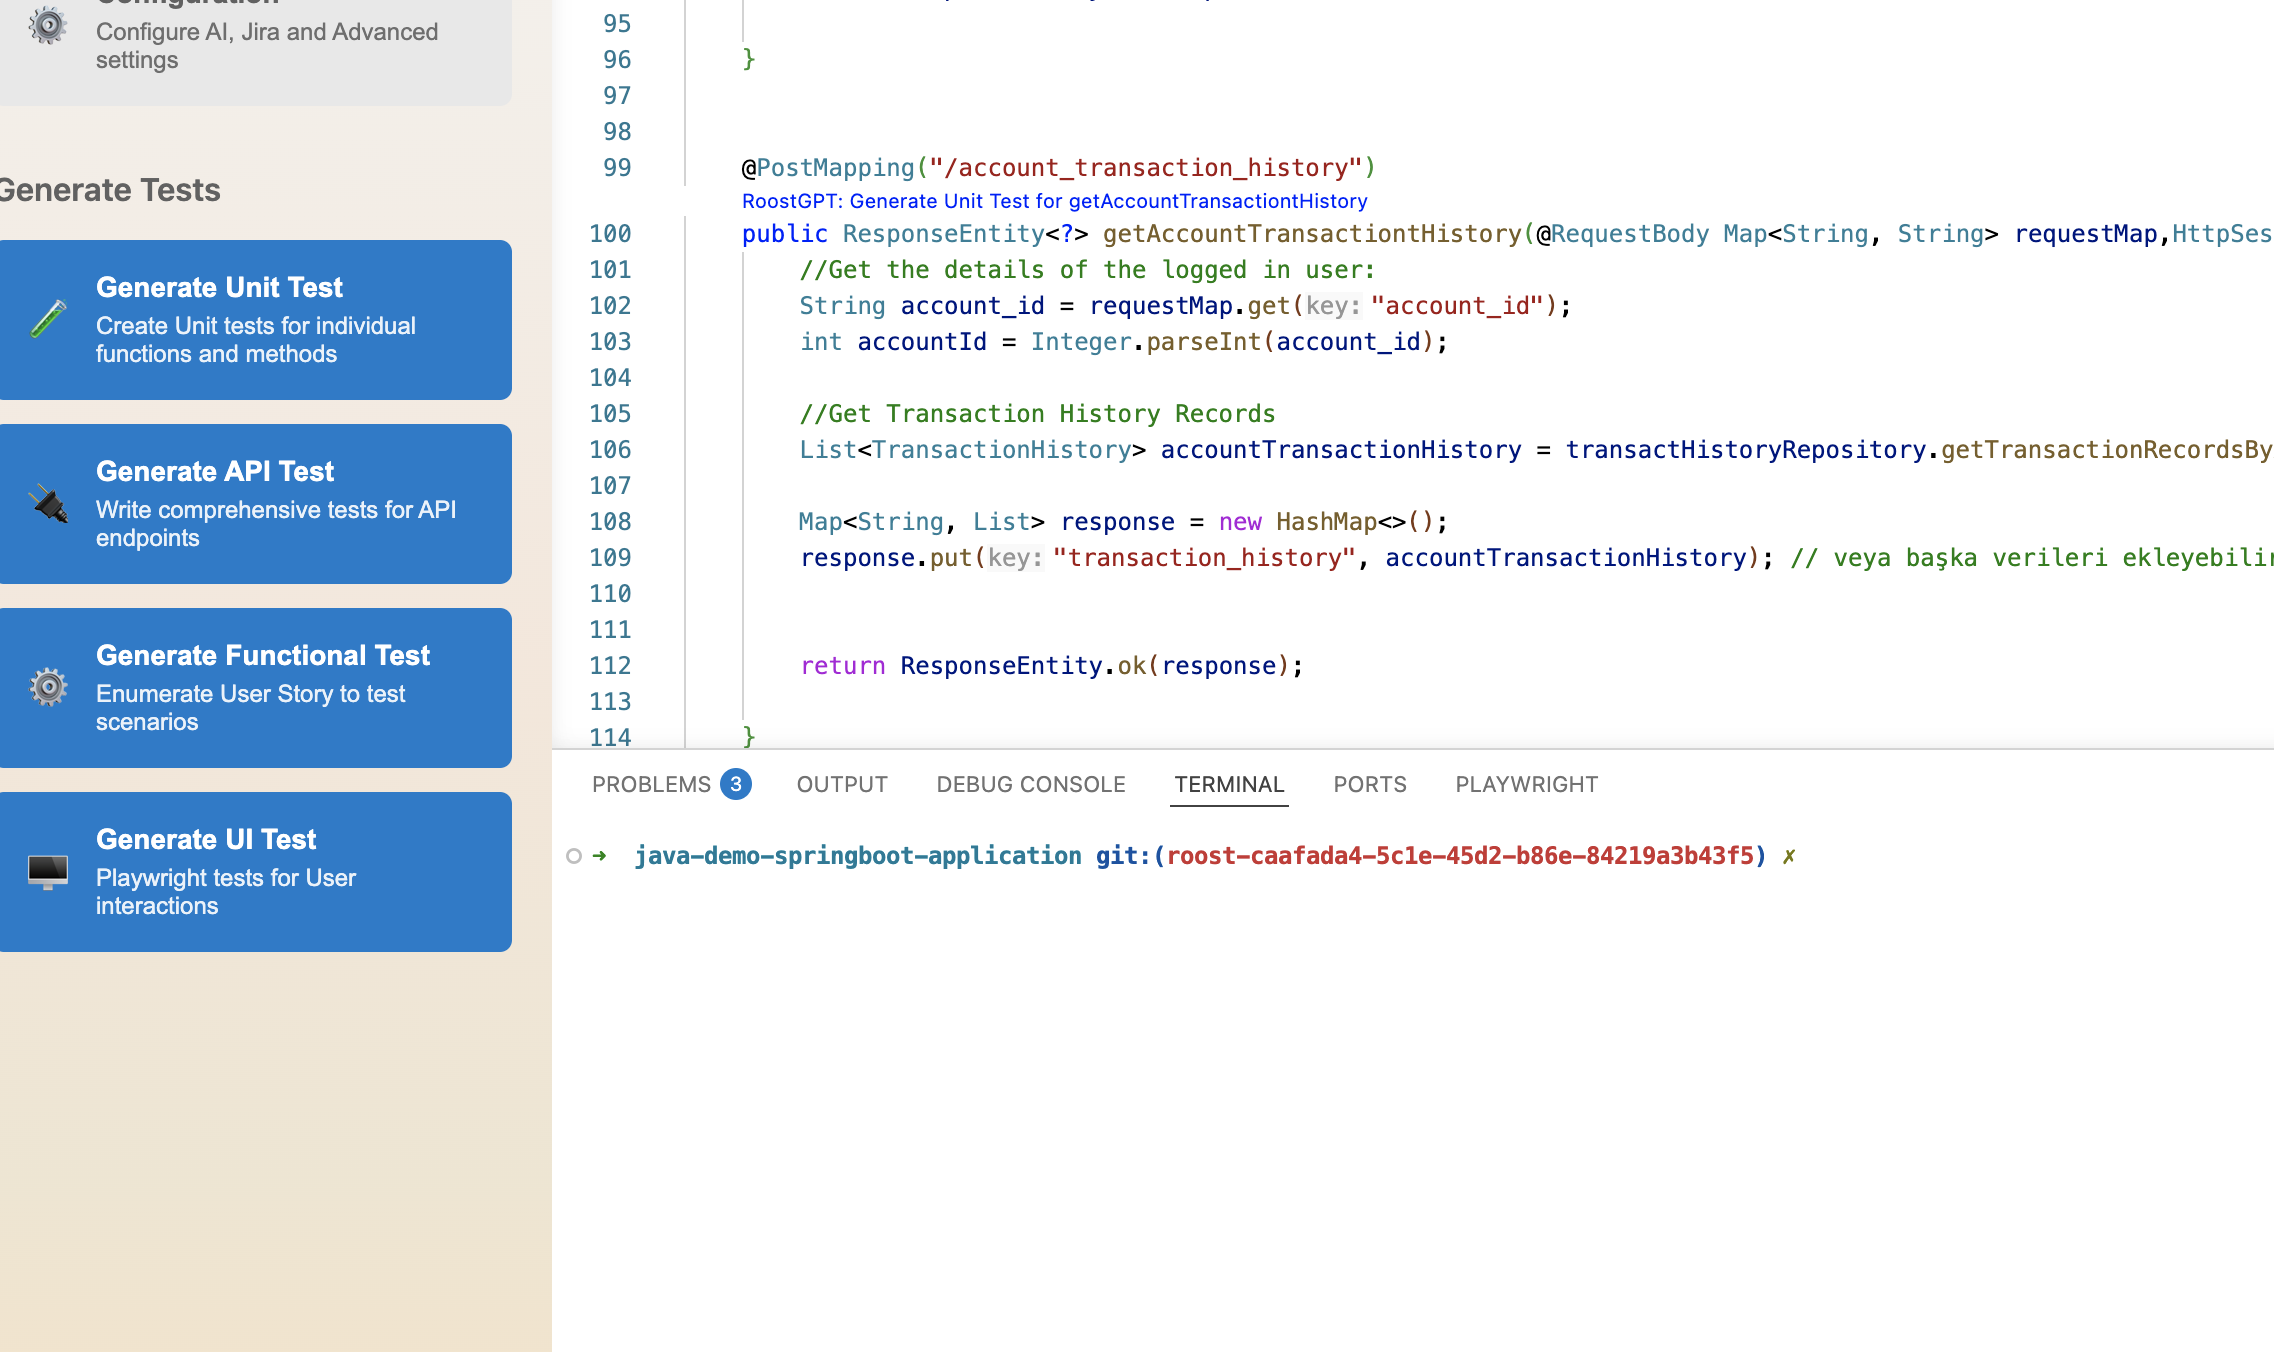
Generated test files are placed in your project's standard test directory, mirroring the source structure.
What's Next?
- VS Code Extension Reference — all settings and advanced options
- Multiple Test Flow — full IDE walkthrough from Jira story to merged PR
- Choose Your Interface — compare Web UI, CLI, and IDE capabilities